


Review: Presonus Studiolive CS18AI
Presonus has designed a control surface to perform the double duties of live console and DAW controller. We find out if the Studiolive CS18AI can be the linchpin of Presonus’s end-to-end utopia.
By Mark Davie
6 May 2016
Presonus set itself a complex task when designing the Studiolive CS18AI hardware control surface. No bones about it, it’s much easier to design console hardware and software at the same time. That way you can trade off software features to meet hardware limitations, or design the software around them. Presonus didn’t have that luxury, it was retroactively fitting a control surface to pre-built software. To take matters to a whole other level, Presonus didn’t just have one software program to interface the CS18AI to, it had two. The CS18AI performs two functions: in a live situation it acts as the hardware front end to Presonus’s RM series of stagebox mixers and accompanying UC Surface software, while doubling as a control surface for Presonus’s Studio One DAW.
Admittedly, Presonus’s task wasn’t as difficult as it could have been. There were some restrictions already built into the way RM operated. The RM series’ I/O routing presents much like a traditional analogue board. You can’t dynamically assign I/O to any fader position — it’s essentially one-to-one. This makes fader layers on the CS18AI pretty straightforward. The top fader layer represents channels 1-16 now and forevermore. If you want to patch a bass next to your guitar, you’re going to have to physically get up and wrangle XLRs at the stage box.
Presonus also deployed its de facto Fat Channel as the input channel processing inside the RM, which includes a gate, compressor, limiter, high-pass filter and EQ. It’s the same processing Presonus has put in its Studiolive series of mixers for some time, so it has experience building interfaces for it.
IN THE STUDIOLIVE MOULD
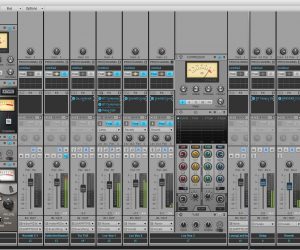
The CS18AI’s form factor is similar to Presonus’s other 16-channel Studiolive consoles. It’s designed to fit neatly into a 19-inch rack by pulling off the end cheeks and whacking some ears onto it. The 18 long-throw motorised faders (16 channel, one flexi master and one master) feel good to the touch and respond snappily when flicking between banks. The translucent, soft touch buttons all feel responsive, and the coloured backlighting gives a good indication of what mode you’re currently working in — green for main mix, pink for effects mixes, and yellow when dealing with aux mixes and DCAs.
While the colour system helps you keep track of the general state you’re in, beyond that point things get a little grey. It’s the same criticism I have of Presonus’s UC Surface app; most everything is presented in a grey and blue palette that means you either have to know your session inside out or do a lot of reading. At least you don’t have to scroll through faders on the CS18AI, which is a big plus. Every input is going to appear in exactly the same spot every time. But that sort of uniformity doesn’t help with the Fat Channel sections: all the knobs are blue-topped, all the labelling is the same colour, and they’re all set out in a straight line. The first few times I used the CS18AI, I had to keep scanning through the labelling to remember which knob to turn.
To me, having a mixing surface with real faders isn’t about nostalgia, it’s about speed. This lack of colour is a real impediment to speed. Even Mackie topped its knobs in different colours back in the early ’90s.
The reasoning behind the uniformity must be because the knobs serve multiple functions. They can be switched to control preamp gains, and can be deployed as parameter controllers for any plug-in inside Studio One. If that is the case, then at least putting colour into the physical labels of each section would have made a difference; as those labels are printed in fixed positions on the surface anyway. The Studiolive knobs aren’t my favourite — they feel plasticky and a little small for my fingers. The upside is that they feel solidly mounted and have enough resistance to not slip away on you.
There is one less row of knobs on the CS18AI compared to the Studiolive 16.4.2AI, but you do gain an LED screen above each channel fader which gives you feedback on channel naming, pan, etc.
NEED TO KNOW
Presonus Studiolive CS18AI
Live & Daw Control Surface
LIVE MIXING
I used the CS18AI and RM16 stagebox combination to mix a five-piece band a couple of times during the review. I connected the two directly via CAT5e cable so I could use the AVB outputs on the rear of the CS18AI. You can also use an AVB switch, which I didn’t have, but incorporating any non-AVB switch or router will stop the control surface’s AVB audio I/O working. It’s also not an Ethercon port on the rear, which suits the double act of hooking it up in a studio. If you’re planning on regularly rolling out an ethernet cable for shows, I’d recommend stuffing the console and RM stage box in rack cases and building Ethercon patch panels at both ends. It will give you a more secure connection to your rack and reduce wear on the connectors that matter — those on the units.
Once the RM rack is fired up, pressing the control surface’s UCNET button gives you the option of linking to it. The reason you have to select what system you’re working on is because the CS18AI automatically detects active instances of Studio One on the network too, which are selectable via a Software drop down menu.
I also plugged the provided wireless dongle into the front of the RM and set up a wireless router so I could also use my iPad for monitor tuning and parameter manipulation.
It’s a handy combination. While the CS18AI can function standalone, I found it much easier to name channels on the iPad, and I kept going back to it during the show to adjust my channel EQ. On the CS18AI, there are only four knobs for the four-band EQ section. They’re set to control gain by default, though you can select frequency and Q via the touchscreen as well as watch a graphic of your curve. Although the iPad does dynamically update fader positions and meters, its current page doesn’t follow the channel you’ve selected on the CS18AI. It’s less painful than it sounds to find the channel and tweak it on the iPad, but a ‘follow selected channel’ feature would be handy at times.
The primary reasons to invest in the CS18AI over just running an iPad are the faders and mute buttons. Whenever I’ve mixed on an iPad, inevitably I’ve double- or triple-pressed a mute button at some stage. Each false positive caused me to frantically press harder and faster, which only made it worse. On the CS18AI, the mute and solo buttons feel solid and responsive, and it’s easy to assign any of the eight Mute Group buttons — just mute the channels you want grouped, then press and hold one of the group buttons. You can also toggle all mutes on and off.
Other than the channel naming, EQ, mixing monitors and tweaking graphic EQs — which are all still easier on the iPad — I found myself pretty comfortable using the CS18AI by the second stint. Once you get a handle on which colour represents the mode you’re in, you’ll stop accidentally balancing FX levels when you think you’re manipulating an aux send.
The fader banks are pretty straightforward. As well as four channel banks, there are the Returns for your FX, talkback and tape returns, the Mix Masters (which are the master sends for your 16 mix buses), Group Masters (which display the filtered DCA groups) and a DAW button for when you’re controlling Studio One. In any of the Master banks, when you press the Mix button above any channel it will spill the channels that make up that mix across the faders. I found this far quicker than the iPad version. However, pressing any other button from there will spit you out into the Main Mix. If you want to return to the previous bank you need to hit the same Master button again. The FX engines each have their own dedicated mute and mix select buttons, which is helpful when you need to quickly knock out a delay if your vocalist talks between songs. There’s also a large tap tempo button that you can assign to one of your two delay engines.
You can assign any channel combination you want to a custom DCA group, and UC Surface will also automatically group input styles — like Instruments and Vocals — into generic DCAs, which is a neat little trick.
The CS18AI is really the hardware embodiment of the end-to-end system Presonus has been trying to build up over the last decade

INS & OUTS
There are four inputs (two combo mic/line and two ¼-inch line inputs) and two (XLR) outputs on the rear of the CS18AI, which you can access when you have an active AVB connection between the console and the RM stagebox. By default the first mic input is routed as a talkback input, and the two line inputs as a stereo Digital Return. There’s nothing digital about them — the pair comes up in the same fader bank as your FX masters — they’re useful for handling analogue inputs from a phone or computer. Unfortunately there’s no processing on this channel, which would have been useful as the video feed I had to run through it needed a little attention.
Although having the extra I/O at the desk was useful, the quantity and routing seemed more suited to when the CS18AI is being used as a DAW controller.
Presonus has also updated the RM’s firmware to allow two stageboxes to be linked together over an AVB network, meaning the system can have a total of 64 inputs, plus the AVB I/O on the CS18AI itself. It could allow users to host some serious I/O at the FOH position if required as well as having a 32-input stage rack. For now, the outputs are limited to the original number on the master rack.
While this review isn’t about the RM series of stage mixers, they are really well put together. The preamps and 96k conversion don’t leave much wanting, especially at this price point. Still, while the four effects (two reverb and two delay) engines present some reasonable sounding algorithms, you’re somewhat limited for choice and flexibility. The main issue I have with the stageboxes is the output pop at startup and shutdown. You’ll want to make sure you have your power up and power down sequence in order.
The other issue I have with the system is the slow response of scene recalls. It takes over a second to switch between scenes, making it useless for in-show recall. What it would be useful for is setting up scenes in an install situation; but without the ability to re-route inputs to different faders, it somewhat limits the flexibility of this approach. If, for instance, you implemented the system in a bio box at a school, some days it might get used by an experienced operator to mix a full band and multiple speakers, while another scenario might be a teacher with little audio experience who only needs to run a presentation. Setting up a scene with only a PC input and mic routed to the first two faders would be ideal, but you can’t re-route input locations in the software. On the upside, you don’t need the CS18AI to be turned on for the iPad app to run, so it still makes multiple setups easier than a standard console.
CAPTURED & STUDIO BOUND
Following Presonus’s breadcrumb trail from live to the studio, I recorded the gigs I mixed using the RM’s Firewire 800 output into my Macbook Pro, loaded with Presonus’s free Capture 2 live recording software. It was completely painless both times. Before booting up Capture, it’s best to make sure the UC Surface control software on your computer is seeing the RM mixer on the network. That way it will automatically populate all the track names in Capture from your UC Surface session. Once that’s done, you can disconnect the Wi-Fi or ethernet link to the RM mixer and just continue on with the Firewire connection.
If you keep the connection live, at the end of your recording you can press a button to store the mixer’s last settings — effects, pans, levels, etc — non-destructively. Then once you open the file in Studio One, not only are the tracks still there, but you can pull up a starting point for your mix — excellent!
If, for some reason, you can’t connect UC Surface on your Capture computer, don’t worry, Capture will still recognise the 16 or 32 audio streams over Firewire, you just won’t have the channels automatically named for you. With the new firmware, if you connect two RM stageboxes you can record up to 64 inputs.

MIXING IN COMFORT
Back in the studio, once I’d figured out which of my routers was reliably sending signal over its ethernet ports, setting up the CS18AI was an absolute doddle. All you have to remember is to press that lovely green DAW button after connecting via UCNet, and you’re off. Pulling up the Capture session in Studio One, all of the channel names were in place, some effects were routed, and the Fat Channel settings and last fader positions were stored — I had a neat headstart.
After settling in with the session, I started to see why Presonus stuck with the single line of pots. I’m not saying I like it, but in this mode they can manipulate most parameters of any plug-in. You can also easily assign any parameter from third party plug-ins to the encoders and buttons in the top row, via a GUI mirror of the hardware. You just pick the knob or button you want to assign to, wiggle the parameter on the plug-in, hit the arrow at the top of the assign window and away you go. It’s one of the more obvious and easy systems I’ve come across. Once you’ve assigned a parameter, it appears in the LCD below the encoder.
Below is a bit of a stretch, I guess; there’s quite a distance between pot and screen. Overall, I think both modes would be better served if the row of pots was just above the screens. Heck, I know it’s unconventional, but the meter bridge could be shifted there too. It would better link the pots to their channel names and numbers when tweaking preamp gain in a live setting, and directly connect the pots to plug-in parameters on the LCD screen when used as a DAW controller.
While I found it useful to escape the screen and adjust most plug-ins via the pots, oddly the Fat Channel implementation is probably one of the worst on the CS18AI. While in the surface’s live mode you can at least access all the EQ controls via the touchscreen, in DAW control mode you can’t even turn each band on or off. There’s no other recourse but to adjust the plug-in onscreen. I ended up replacing all instances of the Fat Channel with separate Pro EQ and Compressor instances. There were other little niggles, like adjusting delay times to get a slapback in sync on Studio One’s Analog Delay plug-in. On your computer, you can hold shift while adjusting the knob to get incremental millisecond values, but there’s no similar option while turning the CS18AI’s encoders.
The fader banks work as you’d expect, you can navigate to the channel inserts by hitting the FX icon on the Home screen. Once opened, you simply touch an insert to bring it up on the encoders. It was handy having faders to mix on, and if you can shell out for an AVB switch you’ll be able to use the CS18AI’s I/O for talkback, mic inputs and monitor outputs.
One of my main bugbears was the simplified transport control. It only has four buttons — play and record, and two buttons marked as ‘skip to beginning’ and stop (which also pull triple duty to allow skipping between markers, fast-forward and rewind). In the absence of a jog wheel, it should at least have buttons for each function. As it is, you have to hit an option and shift button to switch modes. It really sucks not having a dedicated stop button.
FITTING IN
From a purely live mixing viewpoint, if you’re already invested in Presonus’ RM series and solely mixing on an iPad is starting to frustrate you, then the CS18AI is a no-brainer. If you’re looking for a 16- or 32-channel I/O digital mixing system, then the CS18AI is up against some pretty healthy competition in that price range. Yet if you’re after a system you can expand to 64 channels at some point, the economies of scale come back on Presonus’ side. The selling points for the CS18AI don’t stop when the gig ends though.
While I had some issues with how the CS18AI is laid out, Presonus has done a good job of delivering a control surface that works with both its live and studio recording software.
The CS18AI is really the hardware embodiment of the end-to-end system Presonus has been trying to build up over the last decade. Now, with one system, you can mix a live show, record it and mix the outcome on the same gear; with software designed to speak the same language. It’s an impressive pathway and there’s nothing stopping you using an RM box and the CS18AI as a dedicated recording setup either. That’s a lot of I/O with low latency outputs. To get this kind of live to studio, end-to-end hardware and software integration the only other purpose-built option I can think of is an Avid S3L-X and Pro Tools solution; which is aimed at a completely different market and over three times the price.


RESPONSES