

Recording Jazz
With more than 20 years of experience, Ross A’hern knows a thing or two about recording jazz…
5 June 2007
Text: Greg Simmons
Photography: Rafaelo Porter
As a boy, Ross A’hern had an aptitude and passion for painting. However, in 1965 his medium for picture-making changed to sound when his father brought home a valve reel-to-reel tape recorder. After numerous attempts to protect it from young Ross’s wandering fingers, Mr A’hern finally threw in the towel, drilled his son in how to respectfully approach such a delicate technical marvel, and let him loose! And thus began an audio career that has encompassed touring with live bands, building recording and rehearsal studios, and spending two decades developing the facilities at Sony Music Studios. Although he is well versed in all forms of music recording, his skills for recording jazz are especially highly regarded. In his own words, Ross tells AT how he does it…
RECORDING PHILOSOPHY
Ross A’hern: For me, recording is similar to painting a picture, albeit a kinetic one; it’s an attempt to create a convincing reconstruction of reality. I want the finished mix to give the illusion of a vibrant performance, and to that end I prefer to capture the interactivity of a band playing together. I work with the musicians to determine the degree of tonal and spatial enhancement, but the final mix usually tends towards the naturalistic, with the instruments arranged as if on a stage. How big the stage is, and how close the listener is to it, depends on the project.
I’m interested in the characteristic complexity and detail that makes the combination of instrument and player unique. Instruments of a particular type do not all sound the same. Furthermore, the same instrument played by different musicians, even in the same space, can sound and behave very differently! The first step in the process is to listen carefully to each particular instrument, to get an impression of the sound I’m trying to capture.
One benefit of recording an acoustic ensemble, playing live and together, is that the correct balance is obvious from the outset, so you’re essentially working towards the final mix from the moment you hit record. However, it also means that the issues of isolation and spill must be addressed, which also affect the choice of where the recording should take place. The ability to isolate certain instruments – such as double bass, drums and horns – not only makes things easier and quicker for the engineer (as well as allowing for easy overdub fixes of parts in an otherwise good take), but also allows for more distant mic placement, thereby expanding the tonal possibilities of the recording.
RECORDING ACOUSTIC DOUBLE BASS
Generally, I’m trying to capture the full range of the instrument in its natural balance, with no notes too soft or too strong, and a sound with solid and clear body and presence.
I prefer to isolate the acoustic bass when possible, not only because it’s usually softer than the other instruments in the ensemble, but also because, like many instruments, its characteristic tonal balance only comes together at a distance – up close, the sound exists as lobes of differing frequency balances. The loudest sound comes from the ‘f’ hole, but putting a microphone too close to it overemphasises the resonant frequency (especially with a cardioid response, because the proximity effect makes the problem worse). Placing the mic in front of the bridge gives a brighter sound but without as much body, so finding a place between the two often gives a good result.
In order to move quickly during recording, while also retaining flexibility for the mix, I often use two mics. I place my primary mic about 25cm away from the ‘f’ hole, but off to one side to avoid too much of the resonant frequency. (Actual placement depends on the particular bass, what I hear in the room, and what I get in the control room.) This area of the instrument gives a strong and full sound, but the lowest notes can sometimes be a bit lacking. Moving below the ‘f’ hole can capture the lowest notes, but it takes the sound further in the mellow direction.
I place the second mic at the same distance from the instrument body as the first, in front of what I think of as the ‘shoulder’ of the instrument – off to the side of the player’s left hand. This placement gives a tougher, woodier sound, which is useful for capturing transient detail and articulation. I usually find a balance of about 75% of the second mic relative to the first gives a satisfying result, but this balance can be adjusted to suit the mood and tempo of the piece.
I go through fads with mic choice. I had been using large-diaphragm condensers, but I’m currently favouring Neumann KM84s. I usually get what I want from the microphones, but sometimes I’ll add a DI if I need a little of the unnaturally strong bottom end it provides.
I prefer to use Neve preamps, ideally a pair of 1073s if available, for their sonic body. The only processing I’m in the habit of applying is 2 to 4dB of compression on each mic through a pair of Urei 1176s at a ratio of 4:1, which makes the apparent volume of the instrument a bit stronger and consistent.
I try not to use EQ, preferring to work with the variables of microphone choice and placement, preamp choice and compression.


Ross A’hern will generally record the double bass with two mics to balance the different timbres you get from the bridge and the ‘f’ hole. The drums are isolated during recording, which protects other instruments from spill and the drums from spill during more delicate brushwork. As a rule of thumb Ross will use an AKG D112 on kick, and a pair of mics on the snare.
RECORDING JAZZ DRUMS
My approach to drums is a bit more consistent. As with the double bass, I prefer to isolate the drums from the other instruments when possible; it avoids the drums spilling into the other instrument mics if the drums get really loud, and it also provides more scope to capture the detail of delicate drum parts without getting spill coming in from other instruments.
I use a pair of B&K 4003 high voltage (120V) omnis as my primary pair, which I couple with a pair of open-sounding preamps (e.g. Focusrite ISA115) to give air and detail. Apart from these, my mic choices are generally standard: AKG D112 on kick, Sennheiser 421s on toms, a small diaphragm condenser of some type (e.g. DPA 4011 or Neumann KM84) on hats, and a pair of Shure SM57s on the snare (one above and one below with polarity flipped).
I use the overheads to give the overall sound of the kit, with particular attention to the cymbals. Once the overheads are set I introduce the close mics, one at a time, adjusting phase and tone against the overheads to maximise fullness.
Due to our conditioning as to what a contemporary recorded kit should sound like, my tom and snare mics are placed closer than the distance required for their natural sound to gel, so this is the instance where I am most open to reaching for EQ during recording. Also, because the close mics are only augmenting the overhead pair and won’t be heard in isolation, I’m more open to ‘hyping’ them; their job is to bring the elements of the kit into focus and give balance to the overall picture of the kit.
Because I’m after fullness from my close mics, I’ll reach for preamps such as Neve 1073s if available. Their EQ is wonderfully effective and a little goes a long way, but even if I get carried away, the result will remain smooth and rich rather than spiky and harsh. I look for the resonant frequency of the drum because this is where a small amount of boost is most effective in adding body, and I’ll sometimes also boost a complementary frequency higher up if a little extra crispness or articulation is needed.
For percussive instruments such as glockenspiel and xylophone, I like to use ribbons such as the Coles 4038 or Beyerdynamic M160. They’re less harsh than condensers for this application, and capture the detail of the instrument while also lending it a liquid smoothness.
I generally don’t use any compression on drums or percussion because it always seems to mess with the natural dynamics of the instrument (maybe I’ve just never learnt how to do it effectively!). Occasionally, when mixing a loud piece, I’ll use a small amount of limiting over the kit to pull the peaks in a little and provide more apparent level; especially now that I’m recording to digital and don’t have the benefit of analogue tape compression. Also, the use of dynamic mics instead of condensers for toms, snare, congas, etc., makes sense to me because their transient response seems more contained than condensers, yielding higher apparent level. As usual, however, it all depends on the nature of the music being recorded. For a loud piece I’ll compress the dynamics to suit the home listening environment, while for music that is delicate and open I’ll go the other way by bringing up instrument levels to hear all the detail – whatever treatment best fits the picture I’m trying to create.
RECORDING JAZZ PIANO
As with the double bass and the drums, for jazz piano I’m after an intimate balance between the body and presence, which improves as you move closer to the instrument, and the natural blend and image which becomes more coherent as you move away.
The spot that generally works best for me is around the edge of the cabinet in the recessed curve of the body. At this location, I like to use a Neumann M149 about midway between the top edge of the cabinet and the underside of the lid on full stick, looking at the centre of the metal frame, and combine it with a second condenser (AKG C414, Neumann U87, etc.) in bidirectional response to form an M/S array. While it’s traditional to use mics of the same type, I find that the mid mic is the most important, and a mixed pair works fine. I like this technique because it produces a very cohesive image, the width of which can be adjusted in the mix to suit the placement and ‘distance’ of the instrument on the sound stage (remember I am attempting to create the illusion of a real instrument in a three-dimensional space).
I often feed these mics through a pair of Amek CIBs (‘Channel In a Box’). The M149/Amek combination works well for me and has the added benefit of allowing a small amount of gentle compression (2:1 or 3:1) to fatten the sound a little, if needed. Occasionally I’ll apply a small amount of broad-shaped EQ to change the body or brightness in the context of a mix, but I generally leave it as natural as possible.
I’m still getting used to flying without the safety net of a well-designed studio situation


RECORDING BRASS & REEDS
My approach here depends to some extent on the situation. In a ‘big band’ setting, where horns are grouped in sections, I am concerned with the blend. But in a small ensemble, the horns are usually more like solo or featured instruments.
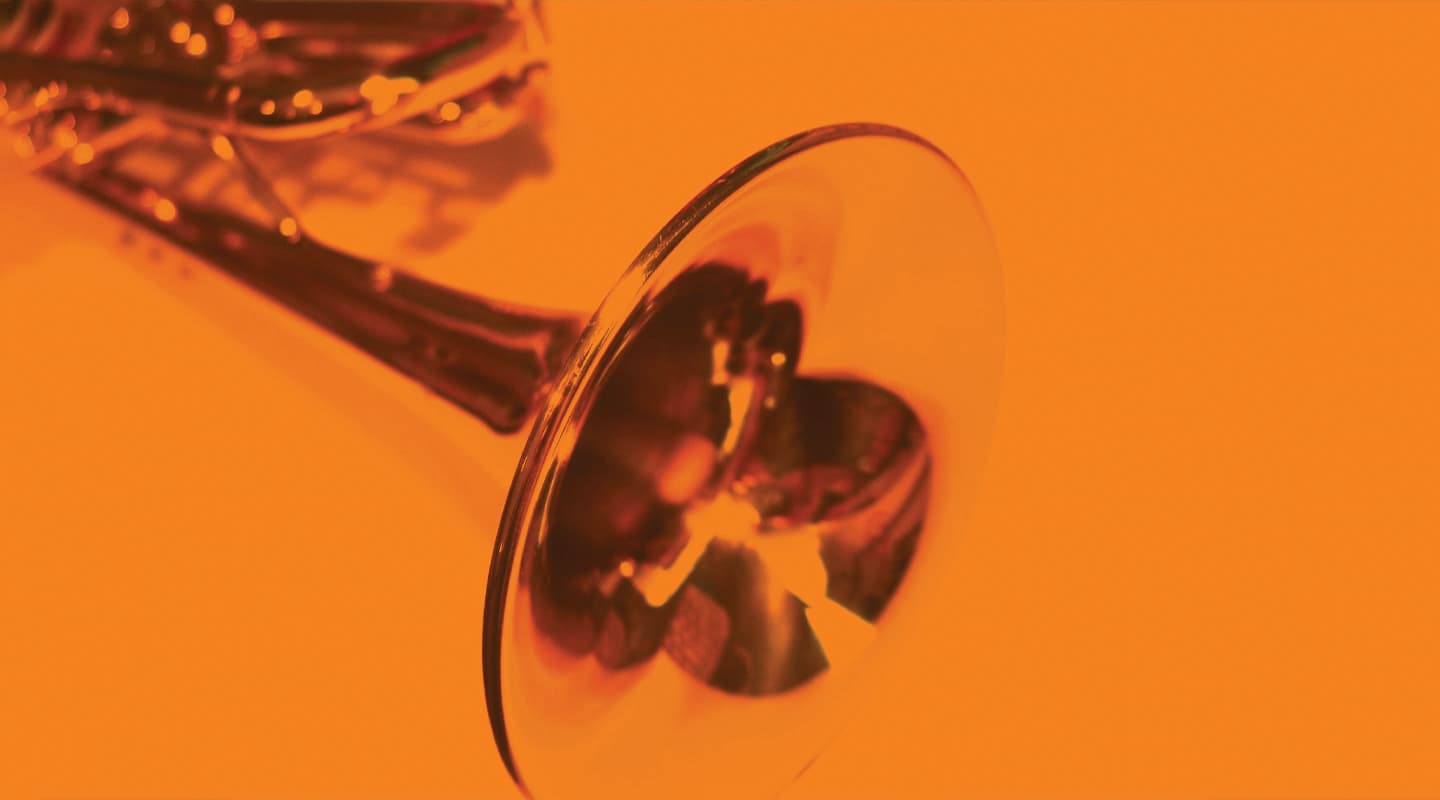
Trumpets and trombones are directional instruments, with most sound coming directly out of the bell, so I usually place the mics 30cm to 50cm in front of the bell, and a little off axis.
The on-axis sound of the trumpet especially can be overly bright, so moving around to the edge of the bell gives a more rounded tone. I generally choose a mic that is not especially bright and which rounds the sound off a little, because I’m after a full tone rather than a strident one. A Neumann U67 coupled with a Neve 1073 preamp and a Teletronix LA-2 levelling amplifier (for a couple of dB of peak compression) is a standard combination that often works well. A Neumann TLM170 or a Coles 4038 ribbon also works well in place of the U67. With a sensitive player who listens and works to the mic, a brighter mic like an M149 can also work really well, imparting a lot of detail. Sometimes I’ll use a more modern compressor, but with similar dynamics to the LA-2, if a cleaner tone with less harmonic distortion is appropriate.
My choices for trombone are similar to those for trumpet, with the exception that I am happy to use a slightly brighter mic, so long as the sound still has body.
Saxophones and clarinets are interesting because the body of the instrument has a number of holes, controlled by keys, through which sound of different frequency balances emanates. With the folded horns, such as altos and tenors, the most complete balance comes from the bell, but as with trumpets, placing a mic too close and on axis gives an unnaturally bright tone. Ideally I’ll use a Neumann U67, placing it about 30cm in front of, and slightly above, the bell to get a balance of tonal body and brightness. I’ll also place another condenser to the side of the instrument, facing the keys. Although this placement provides an extremely dull tone that’s unusable on its own, a small amount blended with the primary mic adds fatness to the sound, which can be especially useful if the player has inadvertently moved closer to the primary mic during the excitement of playing.
With soprano sax and clarinets I place a mic about 30cm above the centre of instrument and perpendicular to it, coupled with another mic on the bell. Not much, if any, of the bell mic is required, but for the soprano sax in particular, a small amount can restore a natural tonal balance. Because the sound at the bell is so bright, I will often use a ribbon such as a Beyerdynamic M160 to round the sound off a bit. As usual, I prefer to avoid EQ if possible, but a couple of dB of overall compression helps to fatten up the sound.
RECORDING VOCALS
My microphone choices for vocals are a little broader and vary with the singer. If the mic suits the voice, I love using Gunter Wagner’s recreation of Neumann’s tube U47 through a Neve 1073 preamp. This combination, coupled with 3dB to 5dB of compression, gives a body, immediacy and liquid smoothness that is just gorgeous. Using a Teletronix LA-2 for compression in this setup gives a little too much harmonic distortion for my taste, so I’ll use a cleaner equivalent such as the DeMaria.
Other standard vocal mic choices, such as Neumann’s U67, U47fet and M149 (especially for male voice), also work well, but it’s always worthwhile trying a few to see which suits the situation best. Another mic I used to like a lot on vocals, although I haven’t used it for a while, is AKG’s C12VR. Its self-noise is a bit high, but its response has a built-in loudness curve that imparts a very big sound to vocals. You have to watch the top-end though, because it has a brightness that can become edgy on some voices.
AND ALL THAT JAZZ
By now, you can probably see a characteristic pattern to my approach: I try to choose the most appropriate mic and work with its placement, rather than processing, to capture the natural sound of each instrument. I try to extend this approach to mixing, as well; I like to keep my reverbs subtle and realistic so that they impart a feeling of air and space, rather than drawing attention to themselves – although there are always exceptions, of course.
We all tend to rely on the combinations of equipment that consistently work for us. Two years ago I would have given a specific list of what I used and how, because my gear choices were stable and I worked exclusively in the same studio. Since leaving Sony/BMG, the available equipment and studios I’ve been using have become much more varied, but my general approach has remained the same and the results have remained largely consistent. I think that’s a good reminder not to get too obsessed with gear at the expense of all the other factors at play!
TOOLING UP, MOVING OUT
With the closure of Sony Music Studios at the end of 2005, Ross A’hern chose the life of the contemporary freelance recording/mixing engineer – tooling up with his own transportable recording/mixing system and going out to capture the music where it is created. In this interview he tells Greg Simmons about his equipment selection and the benefits of moving out of the studio.
Greg Simmons: How did the decision to tool up and move out come about Ross?
Ross A’hern: Well, when I left Sony/BMG at the end of 2005 I had to decide how I could best move forward. Having spent half my life developing that studio, I wasn’t ready to consider doing it all over again from scratch. However, I knew I wanted to keep doing what I loved, which was recording music. I had collected a considerable amount of equipment and experience over the years, so I started looking at ways to utilise and build on what I had.
Having dismissed the notion of building a recording space, I realised I was now in the same position as my clients, which is that whenever there’s a project to record, decisions have to be made about the choice of venue, acoustics, isolation possibilities between instruments, the equipment available, and the quality and availability of a piano, if one is needed. Unfortunately, the state of the Australian industry is such that there are very few facilities that satisfy all of these needs adequately, and when cost is added to the equation, even fewer.
GS: It’s a difficult problem, especially if your clients don’t have the backing of a major recording label to cover the studio costs…
RA: Well, all budgets have limits – it’s just that these limits usually lead to compromise, and I’m not interested in compromises that trade off sound quality. I wanted a solution that eliminated as many of these obstacles as possible, yet was efficient in order to be viable.


GS: What do you mean by “efficient in order to be viable”?
RA: When clients are paying by the hour, they want to get into it as quickly as possible, so you don’t want a situation where the gear gets in the way. It’s great to have the flexibility to go anywhere, but not if it takes too long to set up or the complexity of the system introduces the risk of setup errors.
I needed a recording system that could be to me what an instrument is to a musician, and came up with three requirements. Firstly, it needed to be compact, flexible and scalable so it could adapt to any situation: live, location or studio. Secondly, it had to offer full studio facilities without compromise for any project I might want to do. And thirdly, it had to deliver uncompromised sonic quality. Finding a system that satisfied all these criteria proved to be hard going…
GS: No doubt! I can think of numerous products that would satisfy your first two requirements, but satisfying the third requirement at the same time narrows the field considerably. Why not stick with the system you’d been using at Sony?
RA: That was my natural inclination, of course; I’d been using ProTools for 14 years and didn’t want to make unnecessary work for myself. However, I quickly realised that a mobile system needed to talk MADI in order to handle multiple mic lines between control and performance areas, because a dual optical cable was much more attractive than the weight and performance drawbacks of long runs of copper multicore. There are alternatives to MADI, but I wanted a solution that used industry standards, not proprietary ones. My old ’Tools system couldn’t do any of that, so I found myself reluctantly looking for an alternative.
I also wanted a workstation that used dedicated DSP processing boards, because I didn’t like the idea of having to rely on the ever-changing configuration of host computers. This, and the requirement for MADI, narrowed the options considerably.
GS: You settled on a Pyramix system. How did that decision come about?
RA: I first saw Pyramix at a trade show a couple of years ago and found its features quite attractive, but at that time we had a serious investment in ProTools at the Sony studio so it wasn’t a realistic option. Finding myself free from that constraint, Pyramix began looking much more appealing. It can be configured with MADI, AES or both, and a seriously powerful system can be put together in a single 4RU rack-mounting CPU.
GS: That solves your requirements for dedicated DSP boards and MADI interfacing, but what about audio quality? You’d want some very good analogue I/O to go with it…
RA: Well, as things turned out, the Australian agent for Pyramix also handles Studer’s Vista range of high-end digital consoles. One of the elements of the Vista system is a stand-alone stage box called the D21m, which talks to the console via MADI. The D21m is a 4RU card frame with double redundant power supplies, a MADI board for connection to a control system, and 12 further card slots for a range of analogue and digital I/O options. The unit handles all A/D and D/A between whatever cards are fitted and the MADI ports.
GS: I see an interesting hardware/software symbiosis taking shape here. You can put mic preamps into those card slots, right?
RA: Right… The D21m’s mic input cards each provide four mic/line inputs with isolated analogue splits, switchable phantom power, high pass filters and soft limiters. A single D21m, fully loaded with mic input cards, provides 48 channels of remote controlled mic preamps.

GS: That’s plenty of analogue inputs, but what about outputs? One of your requirements was that the system must offer “full studio facilities without compromise”, and that means you’re going to need foldback/talkback to the performers and so on. I’m assuming the D21m solves this problem as well…
RA: Yes. If I need analogue outputs at the stage end, I simply swap one or more of the mic/line input cards for eight channel line output cards…
GS: …sacrificing four mic inputs for eight line outputs. Does this compromise the system’s flexibility?
RA: It’s true that you’re limited to 12 cards in any chassis, but the ability to choose which cards you load makes the system extremely flexible. For example, with eight mic cards and four line-out cards there are 32 channels of inputs and 32 channels of outputs. That’s usually enough for my needs!
GS: What about the Pyramix software? Does it need resetting when you change the cards? Or can you simply open a menu item and change the configuration?
RA: The thing about the system is that the Studer and Pyramix run independently. For instance, Pyramix will run quite happily whether the Studer is connected or not, and vice versa. Control of the Studer is performed by a simple application running independently of Pyramix on the host computer. Connecting DAW inputs and outputs to the Studer is achieved via a MADI I/O routing page within Pyramix, which gives the maximum 64 x 64 possible options. You just have to ensure there are physical inputs and/or outputs available at the Studer end before attempting to patch to them in Pyramix.
GS: You said the D21m’s mic preamps are remote-controlled…
RA: They are controlled via RS422, which brings me to the last link in the chain: the cable connecting the Pyramix CPU to the D21m. We finally came across a solution by Neutrik called the Opticalcon. It’s a hybrid copper/optical cable with industrial-style dust-protected connectors. The cables are about the thickness of a mains lead and contain dual optical conductors for MADI plus four copper conductors for RS422 control of the D21m’s mic pres. This gave me the possibility of 128 channels of bi-directional audio plus preamp control, all in one lightweight but rugged cable.
GS: Nice… How long are the cables?
RA: The cables are custom made, so you order the length you want; I think in theory they can run up to a kilometre. I decided that 100m was probably the maximum I’d generally need, so opted for a pair of 50m cables that are supplied on small lightweight drums. They can be joined together if required.
GS: So how does the system perform in the real world?
RA: I tested the system extensively for a couple of months before buying it, because I needed to assure myself of its operational and sonic capabilities. The learning curve was pretty steep, probably because I was so used to a different system, but the more I persevered with it, the more I realised how powerful Pyramix is, and more importantly, how good it sounds.
JAZZ IT UP
GS: Tell us about the projects you’ve done with the new system…
RA: There’s a saying that you should be careful what you wish for, because you might just get it! Since putting the new system together I’ve been bouncing from one situation to another. The first project recorded, mixed and mastered entirely on the system was Alister Spence’s new trio recording called Mercury, which turned out wonderfully well. Previously, I would never have dreamt of mixing ‘in the box’, as I didn’t think DAWs were up to the task, but any doubts about Pyramix’s abilities as a mixing system were dispelled by Alister’s project. The EQ and dynamics are fantastic and remind me of working on a really good analogue console – except with full automation and instant recall!
Since then, I’ve used the system to make live recordings of both Adrian Cunningham’s Quartet and the Jazzgroove Mothership Orchestra at the Sound Lounge, and a multitrack recording of the Musicoz Awards night at the Enmore Theatre, which Al Wright remixed for broadcast and DVD. The last was notable in that we had to record 46 tracks continuously for almost two hours at a time, while simultaneously doing a tracking mix, all within the system. Pyramix sailed through without a hitch. There have also been mixing gigs for other studio recordings, and even an outside gig where I did a PA mix, supplied four foldback mixes, made a multitrack recording and sent a stereo reference mix to a video truck, all simultaneously from the Pyramix system. That was interesting! But, I’m happy to say, also painless.
GS: What advice would you give to anyone considering tooling up and moving out of the studio and into the real world?
RA: I would recommend deciding exactly what it is you’re trying to do, and making sure that the equipment you’re considering thoroughly meets those criteria. It sounds obvious, but we all have a tendency to be seduced and side-tracked.
I also think that prospective buyers of any piece of audio gear owe it to themselves to listen and compare before they buy. You can’t trust advertising alone, and it seems to me that the constant drive to cut costs, especially by moving manufacturing to China, has resulted in some products being compromised – even those from well-respected brands, which is a great shame.
We tend to become creatures of habit, but change is a necessary means of continuing our development. Although the shift out of the studio was forced on me, I had already started investigating the possibilities of recording on location again. The studio situation was becoming predictable and I was looking for the variety that different acoustic spaces and performance situations can give.
I’m still getting used to flying without the safety net of a well-designed studio situation, but at the same time, it’s liberating, exciting and creatively very satisfying. I feel like I’ve moved way beyond where I would have been had I stayed where I was, and therefore would heartily recommend taking the leap to anyone.


RESPONSES