


A Producer’s Really Practical Guide To Expensive (Sounding) Record Making – Part 3
In this the third instalment, we finally venture into the studio…
3 March 2008
Tutorial: Michael Carpenter
Now that we’ve locked in a producer, picked the venue and got all the legalities out of the way, we’re finally ready to hit the studio – well almost.
PRE-PRODUCTION?
Like all of the steps we’ve covered up to this point, record pre-production is a vital, yet regularly overlooked aspect of the recording process. For anyone on a tight budget, pre-production is the step that will best help you stick to the budget and produce a great musical result at the same time. Many of the things that might otherwise chew up time in a recording session can be ironed out with a little effort beforehand during the pre-production phase, saving you time and money and studio grief. So what is pre-production anyway?
Pre-production is a very loose term at best. It comes in a number of guises; depending on how prepared you are for the job ahead. This isn’t to say that pre-production is a place where you plan every aspect of the upcoming sessions with military precision. Although it’s certainly true that the clearer the objectives the better the recording will turn out, there’s another broader aspect of pre-production that is primarily psychological. The studio can be a daunting place, especially for the novice. It’s a place where the unprepared can fold under the pressure, where loyalties to band mates can erode faster than the clock ticks if a band member drags the chain on his part. The studio is the ultimate sorter – it can weed out the talented from the passengers and the dedicated from the part timers faster than you can say, “tape’s rolling”. For this reason alone, pre-production is worth every cent (and second) you spend on it.
But there’s a flipside. As daunting a picture as I’ve painted, for the well-prepared artist the studio can be the greatest place on earth. Think about it – if you’re a musician, you’ve no doubt grown up inspired by the music you love, and strive to emulate your favourite records. To finally be in the studio, at the top of your game making a record is an unbeatable feeling. It’s no surprise then that the studio demands that people put their best foot forward and good experiences in the studio are memories that will last forever. As corny as that sounds, isn’t that the sort of thing that life for a musician is all about?
TAKING ON THE STUDIO
There have been many times during my recording career when I’ve heard an artist’s demos (see… they were worth the effort!) and quickly made the decision that he or she was ready to go straight into the studio. On other occasions I’ve had to spend time in a rehearsal studio with a band, discussing arrangements, song choices, tempos etc. Often, and this is especially the case with bands, it’s good to have an objective point of view. Occasionally, after hearing demos and spending some time with an artist in a rehearsal studio, I’ve realised a band wasn’t ready. In these cases I’ve always made some suggestions – for example, that the drummer may need to spend a bit of time working intensively with a click track – and suggested we postpone the recording for a month or so. There’s no point going into the studio unprepared, especially with under-cooked foundations like skills, songs, tempos and arrangements.
It’s amazing to think I’ve spent two and a half issues talking about how to make expensive sounding records, and only now am I ready to say ‘Let’s hit the studio’!
Michael Carpenter tries to do all this and more at Love Hz Studios in Leichhardt, Sydney. You can contact him at [email protected] or visit the studio at www.lovehzstudios.com. There are samples of work up at www.myspace.com/lovehzstudios.
LET’S HIT ‘RECORD’…
There are countless basic rules that apply to anyone entering the studio. Apart from what I’ve already spoken about, there are rudimentary approaches that all musicians should know about before anyone hits Record. Your producer will no doubt have picked you up on a few of these already, but I’ll just give a brief once-over regardless.
TO THE DRUMMER…
Preparing your drum kit before going into the studio is vitally important. I’m personally not of the opinion that you need new heads on every drum top and bottom to produce great sounding drums, but there must be an understanding of how to tune your drums. I’m continually surprised by how many people walk into the studio without the basic knowledge of how to get what they want from their instruments, and drums are no exception. If you’re constantly frustrated by not knowing how to tune your drums, but still you do nothing about it, you only have yourself to blame. In that situation, my advice to drummers is to go to the web, download some basic drum tuning info – it’s not the most difficult thing to do – and set aside a day in your rehearsal space to learn to tune them. Take the heads off (top and bottom) and put them back on – all day if you have to – until you have a proper understanding of how your drums like to be tuned. Every drum is different, and a little investment of time this way will stand you in good stead forever.
Assuming you’ve gotten to the bottom of how to tune your kit, the good news is: that’s the hardest part. If you have your kit sounding like an extension of yourself, then any good engineer will be able to work with you to bring the best out of it. It’s also good to have some extra options. To that end, borrow a few different snare drums of different tones and sizes; the studio may also have some as well. Having options when you’re deep in a tracking session can provide a creative spark more immediately than anything else. Make sure you also have plenty of Gaffa tape and tea towels, that way you can radically alter your tone in under a minute. Remember, the clock’s ticking, so the point is to be prepared and be able to make changes quickly and effectively. And this sort of variety over the course of a session can make your record feel like it was tracked over the course of a month, rather than two days. Don’t be afraid to be bold… take all your toms off for a particular song, or remove your crash cymbals, or use crash cymbals for hi hats… anything that sparks creativity will make your recording sound more expansive, and expensive!
be ready, be aware of what’s happening next and make the most of the time you have

HEY, MR BASSMAN
The bass player is often the least visible musician during recording sessions. Many producers are happy to just give him or her a DI and off they go. But the bass player’s role is fundamental in getting the track feeling good. So, working from the start (and this will apply to guitarists as well), make sure your bass is setup correctly and in good working condition. There’s nothing worse than realising your bass guitar needs a setup when everyone’s waiting and the studio clock’s ticking. Avoid this scenario at all costs! If you have tuning issues with your instruments – and your producer will presumably have picked up on this during pre-production – get your instruments setup a few weeks beforehand. But whatever you do, don’t pick up your newly setup bass on the way to the recording studio! It’s a recipe for disaster.
Again, I’m not a believer in only using new strings. Certainly, if that’s the tone you’re after then go for it (and it certainly makes intonating your bass a lot better), but often old strings provide exactly the tone you’ll need. Again, see if you can borrow a few extra basses for the sessions. One word of warning, though… make sure you don’t just pick up your borrowed basses (or drums, or guitars) on the day of the session. Try to get your hands on them a few days prior and spend some time getting to know what they can and can’t do. Then, once you’re in the studio, if you have a particular sound you like coming out of your amp, don’t be afraid to ask for your amp to be miked up. Many engineers will only need a DI, but having a mic on your rig may quickly get you closer to the sound you’re after.
GUITAR WORLD
I love the smorgasbord of options that a guitar can offer in the studio. So don’t limit yourself: understand what these options are and what they can do. Often there’ll be a need for doubling rhythm guitars, and, in that situation, changing from a Gibson SG to a Telecaster for the double can add an element of class that makes a huge difference. Again, make sure all guitars are setup and functioning properly and put new strings on all the guitars you intend to use a week or so beforehand, to get them settled and played in nicely. The same applies to amps and pedals. Have a few options: small amps, practice amps, stacks, even virtual amps. Get to know what these can all do before you go in (and make sure they’re all working perfectly) and you’ll have tonal possibilities at your fingertips when the pressure’s on.
KEYS FOR KEYS
Often bands won’t have a keyboard player, so a session guy may be brought in. And bands that do have a keyboard player will usually have sounds they like for particular songs, and are often the most prepared going in. As with everything, be flexible, and know the Hammond in the corner at the studio will probably sound more effective than the organ patch on your synth (though not always). Keyboards have so many options these days, it’s more a case of knowing what you don’t want!
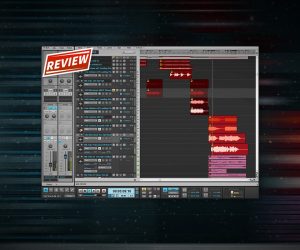
TRACKING
Of course, once we’ve got everything set up and sounding how you like it, it’s all about getting those precious ‘takes’ quickly and efficiently. Decide in pre-production if you really want to track everyone live together. Often bands think they want to do that, when in actual fact they all want to spend time and effort getting their parts just right. If you are tracking everyone live, spend the time getting sounds and headphone mixes right. That way, if you’re well rehearsed, getting takes should be easy. Alternatively, if you’re tracking one instrument at a time but starting predominantly with drums, put down good guides played in time with the click, using good, basic, no-frills sounds. And whatever you do, make sure you play your guides in time with the click. It’s very difficult for even a well-prepared and rehearsed drummer to play well with crappy guides. (As an aside, it may be advisable if your producer has a basic recording setup to arrive at the first session with prepared guides. This can save you a good critical few hours.) And finally, start with the easiest songs, and work up to the more difficult ones once you have a head of steam. Invariably, some songs will take longer than others, so take a ‘little victories’ approach and get a bunch of things knocked over quickly!
When it’s time for the drummer to finally get to work playing to the guide tracks, hop to it. Make sure he or she is hearing lots of click, with a good blend of drums and guides. As usual, five minutes of extra headphone tweaking will mean you’ll not have to ask for anything again, and you’ll play infinitely better. If you’re a well-rehearsed drummer and know your part, you should be aiming for a warm up take and three ‘keeper’ takes. Then your producer/engineer will be able to compile the best bits and at that juncture you may be asked to drop-in on a fill or two that you haven’t nailed. It’s at this point that all that practice working with metronomes will be revealed.
DOWN TIME OR PRECIOUS TIME?
Another thing to bear in mind is that there’s lots of ‘down time’ in the studio. This is the time when drum comp’ing may be happening, or any number of other things may be getting done. When this happens, always be vigilant for what’s about to happen next. Don’t wait until it’s your turn to get your amps warmed up, guitars out of cases etc. Be ready. Have a guitar in your hands getting warmed up, consolidating your parts. If you’ve borrowed some equipment, get familiar with it. If there are lyrics to be massaged, don’t wait until you’re at the mic. Start sorting through backing vocal parts. Think and plan out percussion or keyboard overdubs. Don’t just sit there reading the paper, talking to your girlfriend or playing Nintendo. You should be preparing for your moment right up till it’s your time. That doesn’t mean you wear yourself out – just make sure that when the red light’s on, you’re ready.
Don’t just sit there reading the paper, talking to your girlfriend or playing Nintendo.
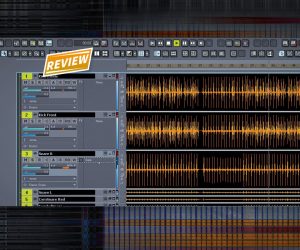
OVERDUBBING
Once the drum tracks are nailed, it’s time to start building the song. My preferred way of overdubbing is to work on all overdubs for one song at a time – it keeps you more focused on one set of ideas. If your studio can make that work, then fantastic. In reality, though, it may be more time effective to work on all the bass tracks, then the guitars and keyboards etc. A happy compromise may be something in between… alternating between bass and guitar for instance. One thing to avoid at all costs though is leaving all your lead vocals until the end! This is a very common trap that countless recording sessions fall into, so don’t become a ‘statistic’ – doing all the vocals at the death knock is a fatally flawed approach that puts way too much pressure on the singer right when studio time is at its tightest. Try to get into your lead vocals as early as possible. A good, well-prepared singer will be able to sing over whatever is currently on the track. And a project always seems to feel better progressed when you tick-off some lead vocal boxes early on. Plus, it makes rough mixes far more palatable, and it can be exhilarating overdubbing to a finished vocal track.
Invariably, you will hit a brick wall at some point along the way. Someone won’t be able to nail their part or find the right headspace to get the best out of themselves. When this happens, persevere for a while but don’t labour over it. If you’re stuck, move onto something else without fanfare or drama. Incidents like these can quickly knock the wind out of your sails, so for instance, don’t send the singer into the vocal booth if he has the remnants of a cold. I guarantee he or she will just want to re-do that vocal later anyway. Your producer will be your greatest ally in this regard – they’ll know when it’s ‘happening’ and when it’s not, so trust their instincts and experience.
If things have gone well, thanks to our meticulous planning, you should be right on schedule by now (or dare I suggest, ahead of it), so here’s where you can start to experiment a little more. I’ve always found that the better prepared a project is, the more confident the artists are in trying new things. It’s the extra things that come from the further extremes of your creativity that push a record into ‘classic’ status and makes records feel world class. So allow your creativity to soar. Believe there’s no sound you can’t get, and find a way to try anything. Listen to your reference CDs and get inspired. If you’re sufficiently prepared you’ll have the time and budget to explore every possibility and you’ll leave the project believing that what you’ve created is not only fulfilling creatively but also a bold statement.
GOING SOLO
For the solo artist (or duo) there are some parallels in the recording journey to that of a band. The big difference usually lies in the use of session musicians, who you’ve often never met before. If this is true, by now you and your producer will have worked through the best players and options. If you can get your musicians demos, or even better, do some basic guides to take in on tracking day, the hired hands can be better prepared and start thinking about parts and sounds etc. Basic chord charts are a huge help here – you can waste a cumulative hour a day doing charts for people.
Spend time talking with your musicians to get them into your ‘headspace’, preferably before the session, or in the precious ‘down time’ – a good musician reacts well to clear and positive guidance. Work with your producer to encourage the musicians to be bold and express themselves, rather than simply go through the motions. What you don’t want from seasoned session dudes is ‘cookie cutter’ parts. Allow the musicians to take risks and you’ll be amazed at the results. Even if they go too far and have to be reined back into something more restrained, giving them the option will liberate them. Keep the momentum of the sessions moving, but allow the musicians to take the time to feel satisfied with their contributions. A musician that feels like he or she has played a great part on Song No.1 will be inspired to do the same through the whole project.
During the session, be considerate of the musicians’ time – don’t decide you want to overdub a lead vocal when there are three musicians standing around waiting to track the next song. And, finally, have a clear and realistic schedule for the musicians. Your producer will be able to help you plan this. Working as a solo artist can be more difficult logistically – there are more people and schedules to juggle – so always allow good amounts of time to get things done. Don’t try to cram things in at the end of a day, you’ll never be happy with the experience or the results!
Finally, try not to be one of those artists that only have a cursory interest in his or her own record. While it may be unrealistic and unnecessary to be at all sessions, check in with your producer on the ones you can be at. Musicians react to the artist’s presence, so be a part of things – but don’t be a pain in the neck either. If the producer has a good dialogue running with a musician, encourage but don’t meddle. If you have something to add, of course that’s great; but if you don’t, don’t feel you have to control the situation either. Ultimately, a solo artist has to take greater leaps of faith with the producer and musicians, but the results can be amazing.
In terms of the solo artist’s parts, you can work through the timing of these with the producer. There will be large amounts of time allotted to lead vocals etc during the process, but take advantage of small windows to get little things done. If you have an hour between musicians coming in, go and put down four or five takes of a vocal that can be compiled later. As I’ve said many times before: be ready, be aware of what’s happening next and make the most of the time you have. This way you’re feeling involved in your own record all the way through, rather than making a guest appearance on the last few days!

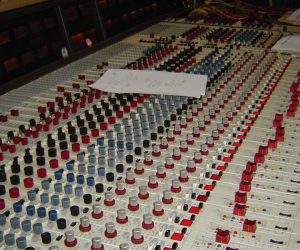
MIXING IT UP
Now that your project is recorded, it’s time to bring it all together in the mix. Our budget is tight so the idea of mixing with the biggest name engineer on a huge console may be out of our reach, but that doesn’t mean we still can’t get incredible results. The merits of mixing in the box (the computer) versus mixing on a desk are not for this article, but let’s just say both have their pros and cons! Just make sure the mix engineer is happy mixing in the way you elect. They’re two very different arts.
Regardless of who’s mixing, it’s always good to bring out the old reference tracks. As we’re getting closer to the finish line, it’s time to really start holding ourselves up against those that inspire us, to make sure we’re making the best record we can. Getting specific, though, these references are important in helping illustrate things like relative volume, wetness or dryness of vocals, compression levels, and tonal balances. A 30-second blast of a production you love can help steer the ship faster than a thousand words.
Everyone mixes differently, but once again, set a realistic time frame on mixing. Try not to work excessively long days, and try to achieve realistic goals. Trying to mix six songs in a single 14-hour day will never work as well as the same amount of songs stretched out over two days. Leave yourself time in your budget for one or two sets of ‘recalls’ (where a mix is revisited at a later date for some tweaks). Let the mixing guy do his job – mixing can be a painfully boring process to witness, so feel free to disappear for a few hours until your mixing guy is ready for you to hear where he’s at. Then come in with fresh ears and make comments. Ask to hear things on different speakers and headphones, and compare each mix with other songs. Be thorough but don’t be laborious. At this point in the production, you and the producer should have a clear idea of the direction, and in its simplest form, mixing should be just balancing, colouring and finishing. Mixing is not the time to re-record lead vocals, or worse, drums!
The beauty (and danger) of mixing in the box is the recallability – things can be re-opened just as you left them, and tweaked till they’re just right. Of course, the main danger of this is taking it all too far, but within reason, mixing in this way affords the artist the opportunity to listen to the mixes in environments they’re familiar with and adjust mixes accordingly.
LISTENING
After a few rounds of tweaks, you should be able to listen to your album and feel it’s a creative extension of you; with confidence that people will listen to it and be blown away by how accomplished and world class it is. Remember – people never listen to albums and think about where it was recorded or how much it cost. They only think about that stuff after they hear it, if ever. So do all the work you can to make yourself as good as you can, get the right people involved, make the studio experience creative and stress-free and you’ll have a record that will hold up against anything else out there.


RESPONSES