


Treat My Room: the Result
SoundAcoustics owner, James Bellew, shows us how he made over the studio of our #treatmyroom competition winner with Australian-made acoustic treatment.
By Mark Davie
29 May 2020
Last year AudioTechnology ran an Instagram competition with SoundAcoustics called Treat My Room. We asked you to submit your studio in need of a little acoustic love. It didn’t matter whether it was a bedroom, garage, broom closet; we wanted to help.
After a ton of great (and varied) entries we have a winner, Brent Murphy (pictured opposite).
We spent time on the phone with Brent to learn more about his space. It turns out he’s a professional guitarist, who uses his room to record local bands and young singer-songwriters. He’s had a love affair with sound since the ’80s, when he headed on the road to make a living between his own gigs. “Back in Melbourne in the early ’80s, there were heaps of jobs doing sound,” recalled Brent. “I found myself working with Australian Crawl, John Farnham and Canned Heat. I learnt a lot from the sound guys on the road.”
Later on in the decade he built a commercial studio in New Zealand: “I didn’t know what I was doing, but we made it work. I bought an Otari tape machine, and I had a Amek/TAC Scorpion console. We were one of the first to get Fostex Synchronisers, so I got a lot of work doing sound for picture.”
It did well, but he sold up and moved back to Melbourne where his Tascam four-track wasn’t really inspiring him to write. “It wasn’t until the late ’90s when computer audio became available that I bought one of those Bondi Blue G3 Macs and a copy of Cubase and got back into it. When the first Digidesign MBox arrived, I bought one and it changed everything. It lit the fire again, and I went on that journey of buying plug-ins and getting better monitors, microphones and some outboard.”
It was perfect timing for Brent who had just bought his house a year ago. After years of setting up futons in the corners of rental houses, he was ready to try some proper acoustic solutions. Problem is, after looking at the different manufacturer’s websites, he still wasn’t sure what kit he should get or whether they’d be any good.
After a few chats with Brent, SoundAcoustics owner, James Bellew, decided on a plan and shipped up a kit of the company’s acoustic treatment then made the trip up to the Central Coast to personally measure and install the treatment.
James has a long history of designing and installing acoustic treatment, having worked on a lot of the major university and audio school studios around the country, a vast number of home studios, and post production facilities for clients like Fremantle Media. Needless to say, he knows exactly how to approach a studio like Brent’s. I’ll let James take over from here.


THE STUDIO
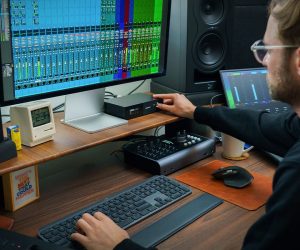
James Bellew: Brent’s home studio is a converted garage that measures 6m x 5.8m. The studio is a multi-purpose space for both recording and mixing, and nicely equipped with ADAM A7x monitors (with subwoofer) and some choice pieces of gear such as an Avalon 737 and Neve preamps, as well as an ELI Distressor.
The walls and ceiling are plasterboard and the concrete floor was partly covered with some light rugs. Although it was fairly reflective and live, Brent had plenty of bookcases and gear around the walls that help.
STEP 1 PREPPING THE SPACE
The first task was to clear the wall space around the workstation so we had bare walls to work with. Then the bookcases were moved to the rear of the studio to help break up some of the reflections.
STEP 2 MEASURE ROOM RESPONSE
I marked out the midline of the studio and put some tape down at 30cm increments along this central plane. This was to simulate potential listening positions for Brent. I then performed acoustic measurements using Fuzzmeasure to look at the original frequency response and reverberation times at each of the listening positions using a mic adjusted to Brent’s typical seated listening height.
STEP 3 ANALYSE INITIAL RESULTS
At Brent’s usual monitoring position the frequency response below 100Hz was somewhat uneven, due to room resonance and phase cancellation (otherwise know as room modes).
Reverberation times are particularly useful when assessing the performance of an acoustic room treatment. The ‘Before’ bargraph on Page 1 demonstrates the reverberation characteristics of Brent’s room prior to applying the acoustic treatment, which show it’s a pretty live space with reverb times around half a second. A balanced acoustic treatment should be designed to reduce reverberation times evenly across the spectrum. A good target range in this space is 250–300ms.
STEP 4 FIND THE BEST MONITORING POSITION
The frequency response at a position further into the room was somewhat flatter than Brent’s usual monitoring position and is the location that avoids the worst of the room modes. See the ‘Finding the Sweetspot’ box item for more.


STEP 5 FIGURE OUT THE BASIC PLAN
A good philosophy when applying acoustic treatment is to install a moderate amount, assess the room and then apply further treatment if required. With Brent’s studio we decided to create a Live End Dead End (LEDE) acoustic treatment, which would allow him flexibility during recording, as well as concentrate the treatment around the listening position.
It’s not strictly LEDE due to the bookcases and gear at the rear of the studio. The studio space is quite large so we decided to install a SoundAcoustics RK3 room kit which consists of eight LF70 corner bass traps, 16 HA600/75 hybrid wall panels and six MP700/40 ceiling panels.
Both the LF70 bass traps and the HA600/75 wall panels feature a shallow-radius reflective insert which boosts low-end absorption and partially reflects high frequencies. This characteristic allows a room to retain a natural sense of space while dealing effectively with problematic lower frequencies.
STEP 6 INSTALL FIRST ROUND OF TREATMENT
Acoustic treatment is best applied to the first reflection points. We installed four hybrid panels on the side walls, eight on the wall behind the workstation, and six panels on the ceiling above the workstation. There’s usually competing interests in most home studios, so it becomes a balance between practicality and results.
The biggest mistake people make is only putting up a whole lot of HF treatment. Psycho-acoustically it makes a huge difference in sense of space and definition in that 1–3kHz range. You can walk into a space that sounds dead, but is acoustically terrible. As well as bass trapping, the reflective inserts in the hybrid panels and bass traps help balance out the room’s treatment.
To help control the low end, we installed four LF70 bass traps in the vertical corners behind the workstation and four bass traps in the ceiling. In an ideal situation the ceiling bass traps would have been installed in a symmetrical layout — though not as important as workstation position or first reflection symmetry — but there was no ceiling corner on the left side. As a compromise the bass traps were installed above the workstation and in the ceiling corner to the right side.
SoundAcoustic panels feature a unique hidden fixing channel which allows quick and easy installation with a staple gun. This is particularly useful when installing ceiling bass traps, as large traps are nearly impossible to install using adhesive.
STEP 7 RE-TEST THE ROOM
After the installation we re-tested the room, and as the ‘After’ graphs show, the reverb times at have been reduced fairly evenly across the spectrum down to 63Hz, which is excellent. This is a good demonstration of the excellent absorption characteristics of the RK3 room kit. Above 50Hz the reverberation times are sitting nicely in the 250–300ms range, which was a good result, especially in a larger space.
Between 25 and 50Hz, you can hardly ever make headway without having a purpose-built space or putting in massive trapping. Helmholtz absorbers are relatively inefficient and would have to be quite big, so you’re talking about putting in four-foot-deep trapping across the whole back wall, which isn’t practical and is cost prohibitive. Also, half a second reverberation time at 50Hz is not too bad, you’ll still be able to mix low end effectively. A LF reverb time of one second or more would be quite bad.
For now, Brent plans to retain his regular mix position to maximise space. In the future, he might decide to move the speakers away from the wall and set up the listening position in this optimum spot. Still, with the superior listening position marked out on the floor Brent can easily slide his chair back and fine tune the low end of a mix. There’s a limit to what you can do in a space not purpose-built as a studio. However, even high-end mastering suites I’ve measured have been lumpy below 150Hz. As a rule of thumb, if I can get a room within ±5dB, that’s fantastic.
STEP 8 LISTEN & FINE TUNE
After listening to some material he was familiar with, Brent noted that the low end was tighter and better defined. At higher volumes he felt the room still sounded a little harsh, so after the installation we sent Brent some additional AT600/40 panels to reduce the reverb times above 1kHz a little more. Fine tuning a room is very much part of the process of applying acoustic treatment.

THE VERDICT
Brent: “It’s been a real eye-opener. The two biggest differences have been the clarity in the bottom end and reverbs. I’ve noticed my reverbs are easier to mix and translate. I’m used to them being murky while I was mixing. Then I’d take them out to my van or another stereo and realise I had too much plate on the vocal. I can make much better choices now in here.
“Another thing I really noticed is I’m not getting the sound of the room so much through the vocal mic. I’m using a Shure SM7, and I’ve also got a Neumann TLM103. When I put the TLM103 up for softer vocals I was accustomed to hearing plasterboard, even with one of those mic shields around it. Now I’m listening to it and I can’t hear the plasterboard. It’s a joy.
“I would absolutely recommend putting up treatment if you haven’t already. I thought the little installation channel at the back of the panels was really clever. You can just fold back the foam, and staple them; you don’t even need a staple gun. I just put up the extra panels he sent me with a reasonably heavy duty stapler. They’re very easy to mount and experiment with, even the bass traps. You look at those and figure they’d be too hard to hold up, but they’re just up there with a staple gun. It would be really easy for somebody to put them up and experiment with positioning at home. I put them up, then took a few down to find a happy balance of liveness when I play acoustic guitar and sing. The wood panelling on the diffusors looks great, too.
“James was great, he explained what he was doing and how he was approaching it. After the treatment went up, the change was dramatic. I couldn’t recommend SoundAcoustics more. It’s made a real difference for me.”


RESPONSES