

Drum Recording: Beyond the Standard Setups
Recording a drum kit is still one of the trickiest tasks in professional audio. This issue we decided to put the word out to engineers across Australia and asked them to describe some of their nuttiest and wildest miking techniques. This is some of what they came up with.
14 April 2014
Text: Brendan Gallagher, Marshall Cullen, David Briggs, Michael Carpenter, Jeff Cripps, Michael Stavrou, Chris Braun, Paul McKercher, Genevieve Maynard, Andrew Bencina, Tim Powles, Andy Stewart, Mark Ward, Blair Joscelyne & Rick O’Neil.
MR SLURPY
Brendan Gallagher: I read an article 15 years ago about Los Lobos recording some tracks in Ry Cooder’s garage, where they used a large Ghetto blaster as stereo drum overheads. I experimented a little with this concept and eventually came upon the idea of using two little Sony micro cassette recorders as room/proximity mics. Generally, I just throw one of these on the floor near the kit, cushioned by a piece of foam to reduce vibration. It doesn’t really matter where you put it, but generally I place it about a metre from the kick drum. The compression is beaucoup harsh and the mic very lo-fi and ugly, which adds a real crusty sizzle to the overall kit when mixed in with the more conventional mic sources. The attack is so hard and the release so slow, that the rhythm of the drums – particularly the kick – generates a washy, phasing effect on any cymbal crashes or ride patterns. I call the recorded track ‘Mr. Slurpy’… because that’s what it sounds like!
Whenever I do a mix, Mr. Slurpy is there on a fader in case I need him. If it doesn’t work, it doesn’t matter, but sometimes it’s just the ticket! I recently used two Mr. Slurpies on some tunes I did for the soundtrack of the Aussie feature film, Subdivision (out through Disney in August), with Jim Elliott (The Cruel Sea) thumping the tubs. One was near the kit – as described above – the other was about five metres away in the adjoining live room. When I mixed the track I panned them hard left and right, adding a crusty halo and depth to the recording. Mr. Slurpy is just wonderfully crappy sounding. I use him for vocals sometimes too.
REAMP, REUSE, RECYCLE
Marshall Cullen: A couple of the more radical approaches to drum recording I’ve done over the years have been borne out of necessity. Either I’ve needed to fix a ‘problem’ or I’ve had to create interest where there wasn’t any.
Re-amping the snare is probably the most obvious technique I’ve used – it’s maybe a bit dated now that sampling and drum replacement software has become so commonplace. It’s the original analogue approach that was used to spark up a not-so-great recorded snare sound. The idea is to run a line-level signal from a snare channel’s auxiliary send back into your live room and rig it to a power amp and small speaker. Lay the speaker on top of a good sounding snare drum and let the old snare ‘play’ the new snare. Mic up the snare with a distant mic for that revved up sound or the old SM57 up close and below (or any combination of the two). Run the new snare through the desk when mixing, or run a pass to a spare track if you have one.
Of course, if the kit has been recorded with only close mics in a very dead space and you want to liven it up without using plug-ins – replay the whole kit thru a small PA into your live room and mic the room sound!
PZM (boundary) mics also work amazingly well in odd spots around the kit. Try a pair under the kick drum legs on the floor and then gradually widen them out to widen (or narrow) the stereo image. These are a great thing to try if the close and room mics are sounding thin. Try one in mono gaffed to the wall behind the drummer’s head and maybe another on the wall at the front of the kit. The results depend entirely on the room but they should fatten the sound up a lot – put them on drum carpet of course.
The other obvious thing to try is this simple idea: don’t use drums! I once created a ‘drum kit’ out of found objects in the studio: the snare case became the kick drum, a garbage tin lid became the snare, the fire extinguisher became the hi-hat and a plastic bin the floor tom. Change the source and you change everything.
SHOTGUN TARGETING SNARE
David Briggs: My favourite secret drum miking technique (well, not so secret now) involves placing a Neumann Shotgun KMR82 (which is extremely directional) as high as I can over the snare drum… maybe 13 feet up and sighted directly on the snare. I find this gives the snare a sense of life that no close mic ever captures. It also negates the need for a hi-hat mic and fills in the centre image space that’s often left by placing overheads too far apart in the stereo spread. I always use a spectrum analyser when I’m working too, which allows me to keep a close eye on the phase relationships between the overheads, the shotgun, the toms, kick and snare mics.
I also use a mic placed low in front of the kick drum aimed squarely at it from around four feet away, to capture some of the low frequencies. This helps give the kick a sense of ‘air’ and also helps the low frequency ‘speak’ of the toms as well. In the mix I typically roll off all the top end out of this mic to get rid of the cymbal hash and often compress and gate it, keying the gate response from the kick and toms so it only speaks with these elements… again checking its phase against the other components.
I also use what I call the ‘trash mic’ track, which is any mic placed high into the corner of the drum room to capture the reflections off the walls and ceiling, facing away from the kit. I may do something weird and wonderful with this in a mix or, alternatively, not use it at all.
The other big variable I focus on is the set up of the gobos in my drum room, and the general acoustic environment. I have a mirrored drum room, which can be dampened down by closing heavy curtains and placing gobos across the front of the booth. One side of the gobos is wood for reflection (if I want it loud), and the other side provides much more absorption… it all depends on the intention of the track, of course.
PUTTING THE TRASH BACK IN
Michael Carpenter: There seems to be a ‘standard’ way of miking drums. I know I’ve done it a thousand times, maybe more. But with repetition comes complacency, so a while ago I decided to try something new on every session, to augment the ‘standards’.
Easily my favourite trick is to take my robust and trusty old Fostex M11RP ribbon microphone and place it above the kick drum, pointing at the side of the snare, angled carefully to capture a good spread of the whole kit, with the ride cymbal dulled off by the action of the polar response. This signal is crunched pretty heavily through an 1176 or similarly brutal compressor, while still making sure some of the attack gets through. Tonally the mic doesn’t have a lot of top or bottom end, and it gets a bit ‘brash’ around 3k, but that works perfectly for what I need it to do. Mixed in underneath the close mics, it helps bring the kit to life.
Throwing a distortion plug-in like Sansamp, and compressing the ribbon even further during mixdown also adds a defined ‘energy’ to the kit. I also like to use it occasionally during mixdown, where I mute all the close mics and use this single mic for a section of the song to heighten the dynamics of a track. It’s not something I use every time, but I record it almost every time.
I also have a cheap AKG dynamic permanently plugged in that’s pointing into the corner of my live room window. It’s routed permanently into an old Shure mixer that has the most aggressive built-in compressor, with a particular release time. On songs with a certain tempo – usually mid tempo – the cymbals release with a lovely rhythm, and the tone is diffused nicely by the peculiar positioning.
Some other experiments have included placing a variety of cheap and expensive mics into other drums, garbage bins, guitar cases, pianos, bongos and drawers in a variety of places around the kit. Sometimes the result isn’t worth the effort, but occasionally you stumble on something that works so well it ends up defining the track you’re working on. It’s important to have at least one mic set up for every drum tracking session doing something unusual.
TO SOLO OR NOT TO SOLO
Jeff Cripps: I’d like to direct my first point directly at drummers if I may: if you’re a drummer who’s about to record for the first time, don’t do a 15 minute drum solo for a sound check. The band won’t be impressed, they’ve heard it before; your girlfriend won’t be impressed, she’s chatting up the guitarist; and the engineer won’t be impressed because he or she might even be a better drummer than you are.
When you’re asked to do a drum check, particularly at a live soundcheck, just play a groove. Hit everything once every four bars to give the engineer a fighting chance, and don’t speed up! Try to impress the engineer with your great sense of timing and groove, your consistency, your patience and attention to detail. Look to the engineer for instructions, literally – he or she will be your best friend for the next little while so be nice to them.
If you’re performing live regularly, another great idea is to buy the same skins for the top and bottom of the toms. That way, when the top skin bites the dust, you can get the skin from underneath and place it on top and put the new skin on the bottom. That way your toms always have two fresh skins, not one fresh skin and one that’s three years old.
GETTING THE DRUMMER TO MIC THE KIT
Michael Stavrou: You want nutty? I was working in a studio that didn’t have many microphones and was unhappy with the drum sound. They just didn’t sound ‘up close’. The stereo picture was average too. So I dreamt up this idea and tried it…
I wondered, could there be a way to mic each drum and cymbal, hi-hat and each of the toms from less than a foot away with only two mics? How the heck can you mic a 12-piece drum kit with only two mics (plus a bass drum mic) and capture each piece from only a few inches away?
Well, I took two wire coat-hangers, two lapel mics and two drumsticks. I made a big slow spiral out of the coat-hanger, with one end connected firmly to the back end of the drumstick, wrapping high over the knuckles and connecting just short of the tip. On the high point of the coat-hanger, over the knuckles, I attached a lightweight lapel mic pointing at the tip of the drumstick.
The idea was that the drummer would bring the microphone to each element of the kit and automatically position the mic for me – near the drum just in the nick of time before it made a sound! As an added bonus, there would be no open mics on nearby drums that weren’t being struck. Naturally, you would then pan each mic left and right opposite one another so that each alternating hit would come from a different speaker.
I can’t tell you how excited I was. This seemed like a real breakthrough. Then came the big day. We had a suitable drummer guinea pig that, although he felt this was rather peculiar, was comfortable holding the drumsticks and having cables crawling back over his shoulders. The red light came on, the drummer began to play, and with the first hefty strike, the microphone went flying off into oblivion! I guess I needed a better shock absorber. Well, that was that. I didn’t pursue it because we didn’t have any more tiny mics but I’ve always wondered what it would have sounded like if I could have found a way to secure those mics.
If you want a more serious practical solution to the common problem of getting too much hi-hat onto the snare mic, get a spare mic stand with a butterfly clip – the spring-loaded kind that closes completely – and have it bite a piece of cardboard roughly the size of your hand to hold between the snare mic and the hi-hat – works a treat.
CRAP MIC, CRAP COMPRESSOR
Chris Braun: I’ve had the privilege of learning my craft from several rocking engineers over the years and seen some very cool yet weird stuff during my time as an assistant at Sing Sing in Melbourne, where I learnt that it’s often the little things that make the biggest difference.
Room mics can make or break a drum sound. Turn them up just a tiny bit too much and you wash out your sound, so be careful. It’s easy to get excited when you have a great room or ‘wacky’ sound that rocks. A little generally goes a long way.
I find the best room sounds come from the cheapest mics! I’m talking mics that are so crap people will probably pay you to take them off their hands. I still have the mic that came with my first PC computer. It’s a crappy mic that weighs all of two grams but it’s turned out to be the most bad-ass sounding drum mic ever! I tape it to mic stands, cymbal stands, even to the drummer’s headphones occasionally and compress the bejesus out of it with, yep, you guessed it… the oldest and crappiest compressor in the rack: the less knobs the better!
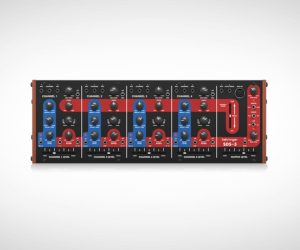
For this purpose I got myself a couple old dbx 163 compressors off eBay for $50. They have one slider on them that simply says “Less” or “More”… now that’s my kind of compressor!
But there’s no point going and doing all this if you haven’t covered your bases with well-considered close mics. Capturing full-bodied, rich drum sounds is what it’s all about. The other room mics are ‘flavour’ mics.
A quick word about hi-hats…
Hi-hats are like sand… they get into everything! So here’s an easy technique that can sometimes help reduce that “sppsssss sppsssss” coming through your snare sound.
The more you can get the back of your snare mic pointing towards the hi-hat, the less bleed you’re going get but sometimes the arrangement of the drummer’s kit makes this impossible.
If your mic position can’t face the snare while simultaneously pointing directly away from the bell of the hi-hat, see if you can find yourself a bit of acoustic foam and place it between your hats and snare mic (see image). This is often a great way to take some of the bite off the hi-hat and reduce the bleed.
ONE-MIC WONDER
Paul McKercher: This technique is simplicity itself and is too good not to share. Credit for it must go to legendary engineer/producer/mixer, Tchad Blake, whose work is both brilliant and truly distinctive in style.
Firstly, you’ll need a well-tuned four-piece kit with quiet cymbals and hi-hats (tape ’em up if necessary) placed in a small, dead room. Use a dynamic mic with a smooth, mellow top end: the Sennheiser MD441 is a good pick but experiment with whatever you’ve got. Sometimes ribbons can work, so long as you don’t overstress the ribbon with high SPLs. Place the mic so that it points at the snare but instead of placing it in the usual position under or near the hi-hat, come in with a short stand from under the ride cymbal so that the mic is over the top of the kick drum pedal near the drummer’s knee, at a height similar to that of the kick drum. This will mean that the mic is probably pointing at the snare shell rather than the top skin, which is okay.
Position the mic so that its diaphragm is more or less equidistant from the snare, rack tom and the top of the kick drum rim but still pointing at the snare. This should give you a nice balance of those three drums as well as picking up enough floor tom. Moving the mic by degrees will let you fine-tune the balance. For a preamp, use one that has a bit of grime in it, a UA610 or a Neve for instance, but whatever sounds good, is good. Run it hot so there’s a bit of dirt in there, then compress with, again, something a bit grubby: a UREI 1176 is a great choice but anything opto will do the trick. Select a higher ratio – 8:1 or more – and start tweaking so that you flatten the peaks and bring out the lovely overtones of your nicely tuned kit. You could distort it further with a Sansamp or a guitar pedal if that’s your flavour. Generally you won’t need to EQ till later. This technique is song dependant (what isn’t!) and won’t work for a brash, hard-hitting rock part with lots of splashy open hi-hats since it involves generating a fair amount of distortion, but if the song and the part is the right fit, you will be amazed by the results. Phase perfection and the shortest setup time ever!
PITCHING A TENT
Genevieve Maynard: I recently took a pair of Neumann KM84s and put them about a metre in front of a drum kit spaced about 1.5 metres apart. Oriented towards the kick drum but pointed at the floor, these were placed about 2cm above layers of sleeping bags and carpet I’d lay down to kill the top-end reflections off the floor. I then took some leftover acoustic floor treatment and made it into little tents, which I gaffed to the mic stands, completely enclosing each mic. Naturally, this sounded truly awful and let very little top end through at all, resulting in a dull, muffled, booming sound – perfect! Then I cranked the pres up till they were completely overloaded and distorted and ran them through an 1178 on 4:1 with very fast attack and release times, took out a bunch of midrange frequencies with some heavy-handed EQ, and ended up with the most fuzzy, moody, amorphous, obnoxious and quite possibly useless room sound I’ve yet created!
ROCKS IN YOUR HEAD
Andrew Bencina: Now I can’t claim responsibility for this little technique – it came from a studio in Slovenia of all places. My main drum/band room happens to be a carpeted affair. While I find the wood panels and beams create a live enough feel for most instruments, there’s no doubt that it’s a touch muted, and with drums this is often precisely what you’re wanting to avoid. That’s where the Slovenians come in. I was already using some large sheets of old flooring to occasionally provide a solid and more reflective base for drum kits, but the Slovenians offer an alternative: river stones! Collect a horde of large, flat river stones from your local brook (or Bunnings garden centre, as the alternative is illegal here!) and spread them out around the drum kit after you’re all set up and everyone’s happy. What you will now have is both a reflective and diffuse surface to scatter the sound and liven up the dullest of spaces. Okay, so you won’t have that big live room sound that you dreamed of but it certainly makes a difference. Give the snare wires something to bounce up off into the other mics and you may be able to claim back that snare bottom channel for other duties. Just watch your back when storing the stones because they’ll challenge even the beefiest Fender Twin for weight if you try and cram them all into a single crate.
WHITE GOODS REVERB
Tim Powles: There’s a very low ceiling at my Spacejunk III studio where I work, and by ‘low’, I mean you can reach up and touch it. Not surprisingly, as a consequence there are several holes in it from where people have accidently driven stands and guitar headstocks through it. So when recording drums at Spacejunk III my most fundamental issue is trying to establish a regular stereo room or ambient image, or some length to the drum sounds. There’s no natural decay or space to be captured from above, so we use horizontal distance instead… with equidistant microphones often winding up in separate rooms to each other, often three or four metres away from the snare.
Interestingly, the room to the left (usually the hi-hat side) is an (almost) retired laundry and bathroom, replete with tiled floor, a washing machine, a steel wash tub, a small bar fridge, a dryer and a lavatory conveniently positioned to make a drum stool redundant. Inevitably, the room mic assigned to this space has not only often found itself in the usual spots: ‘up into a corner’ and ‘in the shower’, but also: ‘looking into the open dryer’ and eventually ‘IN the dryer!’ This has an amazing soft plate-like ambience that (with compression applied as one desires) is so natural and old-time/analogue it has to be heard to be believed! (The dryer is local brand but I can’t give it away – timEbandit patent pending!) This has naturally led to an entire kit growing in the laundry, with drummers suitably sitting on ‘the throne’ (check for flushing sounds please mastering engineers).
Interestingly, during recent preproduction for the new Regular John album, most of the arrangement rehearsals were thrown down by Macca (the drummer) in one take using this setup with no real view to its later use. When we later ran into ‘demo-itis’ at Rancom St Studios (where we’d gone to for a bit more ‘space’ and Ted Howard’s golden ears), we just couldn’t get the same vibe back – and several roadside piles of disused white goods were eyed up for hijacking with ambient intent…
Nothing eventuated, however, and the good old laundry ‘white goods’ kit has prevailed on more than a good third of the album!
FREEWHEELING MICS & A STEREO SNARE
Andy Stewart: Having played drums on many records over the years, I’ve been on both sides of the recording glass: drumming, engineering, producing and mixing, and I’ve witnessed many a drum miking travesty. I’ve also been asked to rearrange my kit by engineers on more occasions than I care to remember, and each time I’ve thought to myself: would I ask a guitarist to reshape the neck of his or her instrument to suit how the engineer mics it up? No, I wouldn’t. So, first point, don’t ask the drummer to rearrange his setup unless it’s critically important. Chances are it’s evolved over many years and needs to be setup that way so it feels comfortable to play. If you must ask, be polite, and explain clearly why you think the kit needs to be repositioned. You might find that by offering a logical explanation, you realise it wasn’t all that crucial after all.
One technique I often use appears in another article this issue (see Anatomy of an Install on page 48) in what must be the most bizarre coincidence I’ve ever seen in this mag. I discovered it many years ago while trying to choose between two snare mics…
Place two mics in reasonably conventional manner around the top rim of the snare so as to appear like two spokes on a wheel, with the mics pointing at the hub. If possible, choose two very similar mics, but preferably not identical, and pan them hard left and right. The slight difference between them will encourage a tiny bit of movement as the idiosyncratic tones of each hit is emphasised by one mic or the other. The snare will be stereo, not mono, but assuming the two mics are similar in volume, the mic will still appear quite centred in the mix, only bigger and wider. It’s a great setup for intimate drum recordings, close brushwork etc, or wherever you anticipate the drums might feature quite strongly in the mix.
Another thing I love to do is mic rooms other than the one the kit’s being played in, wherever possible, either with big mics on long leads, or small freewheeling recorders that you set and forget. The latter you can’t monitor, of course, and with these you’ll have to drag the files off later in a game of lucky dip. In big studios and houses alike, distant room mics provide both a delayed sound as well as a radically different perception of the performance. And perhaps more importantly, the distant room recordings are so different to the close mics, they rarely if ever attack one another in terms of phase – the waveforms are just too different. This can offer great depth to the kit during mixdown and usually forms the basis of a much more interesting reverb than any digital device.
Overall, I think interesting drum mic setups are based on asking yourself what the song needs, and understanding that once your key mic setups are rock solid, ‘radical’ mics are often as much about what’s missing as what’s captured. For example, some of the best drum sounds I’ve ever heard have been coming from behind a closed door… so why not mic up the door?
One final point: positioning mics is one thing, recording chains are quite another. Often the most ‘vivid, natural and hi-fi’ drum tones are often, in reality, quite distorted. Mild distortion on things like kicks and snares brings a kit forward, making things sound clearer, not uglier. The trick is to develop a keen understanding of the counter-intuitive nature of distortion – sometimes it has the opposite effect to what you anticipated. And always remember, if you set up three badly positioned mics, they don’t magically combine later to equal one well-placed mic. Nor does moving a mic’s position during recording equate to moving digital files around on the timeline later. That is a total fallacy and the worst form of engineering. Move the mic, not the file.
PILLOW TALK
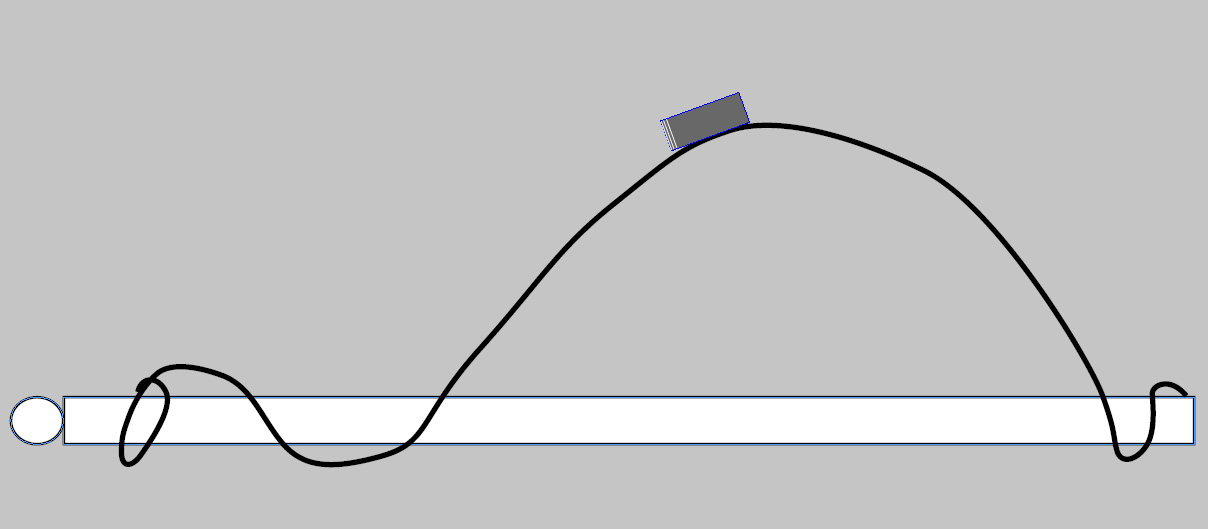
Mark Ward: This technique is not that zany but it’s one that I find has a big effect on the outcome. It involves a PZM plate mic made by Tandy in the ’80s with a crown capsule – not around anymore. The amazing thing about this mic is where you face it. Put it one metre in front of a drum kit, and set up a string pulley system on top of the mic so that when you release the string the mic starts to point toward the floor. You will notice that, as it leans further forward, it goes from dry to this monstrous room effect all in the space of three inches. Once you find the sweet spot, gaff the string. Another simple but effective technique is to put a standard pillow in between the rack toms and between the floor tom and kick drum. Listen as all the nasty rings disappear and a beautiful separated kit sound emerges. It sounds amazing but looks like you’re off to bed. Also, forget bottom snare mics. It really distracts from the kick and top snare crack – a waste of energy… just ask Led Zeppelin.
THE TUNNEL, THE HELICOPTER & VOICEMAIL
Blair Joscelyne: The Tunnel: Large pieces of air conditioning piping (which you can buy for not much dosh) can create some seriously funked up sounds. Simply place one end of the pipe in the room with your drum kit, run the pipe through your studio, up the corridor, out the window, across the street and into the hall next door (or back into a spare room). Stick a microphone into the end of the pipe and either yell really loudly down the pipe, or call your drummer and tell him to start hitting.
The Helicopter: For this one, you simply need to connect your old SM57 to a mic lead you don’t care for, and while standing behind the drummer, start swinging it in big circles around his head – horizontal to the ground – as he plays. Some seriously wack phasing ensues, and with two people swinging in different parts of the room, you won’t know what decade you’re in!
Voicemail: Chuck your computer into the bin and grab your mobile phone for some crusty goodness. The phone is always a sure-fire way of getting some lo-fi tone. This one is as simple as it gets. Call yourself and then start playing your kit while leaving yourself a message, then record it off into the DAW (which will need to be recovered from said bin).


RESPONSES