

D.I.Y. VU
Buying VU meters is one thing, getting them to work in your studio is quite another. Follow our step-by-step guide to selecting and wiring up a bulletproof VU metering system.
4 December 2006
Text: Rob Squire
Not long after Stav’s first article on VU Metering hit the letterboxes and news stands, I perceived a muttering on the streets; an undercurrent across the nation in studios large and small that went something like this: “I want some VU meters and I want them now!” This has led to several conversations since with people who’ve quickly discovered that there’s more to getting VU meters setup in their workspace than simply popping down the shops and asking the guy behind the counter for a ‘couple of VUs’. As a result of all of this I’ve decided to try and clarify a few things by providing some facts about VUs and how to get them up and running in your studio. I’ve also designed a circuit that any interested (and mildly skilled) AT readers will be able to adopt to get their VU meters working accurately and predictably.
VU PROTECTION
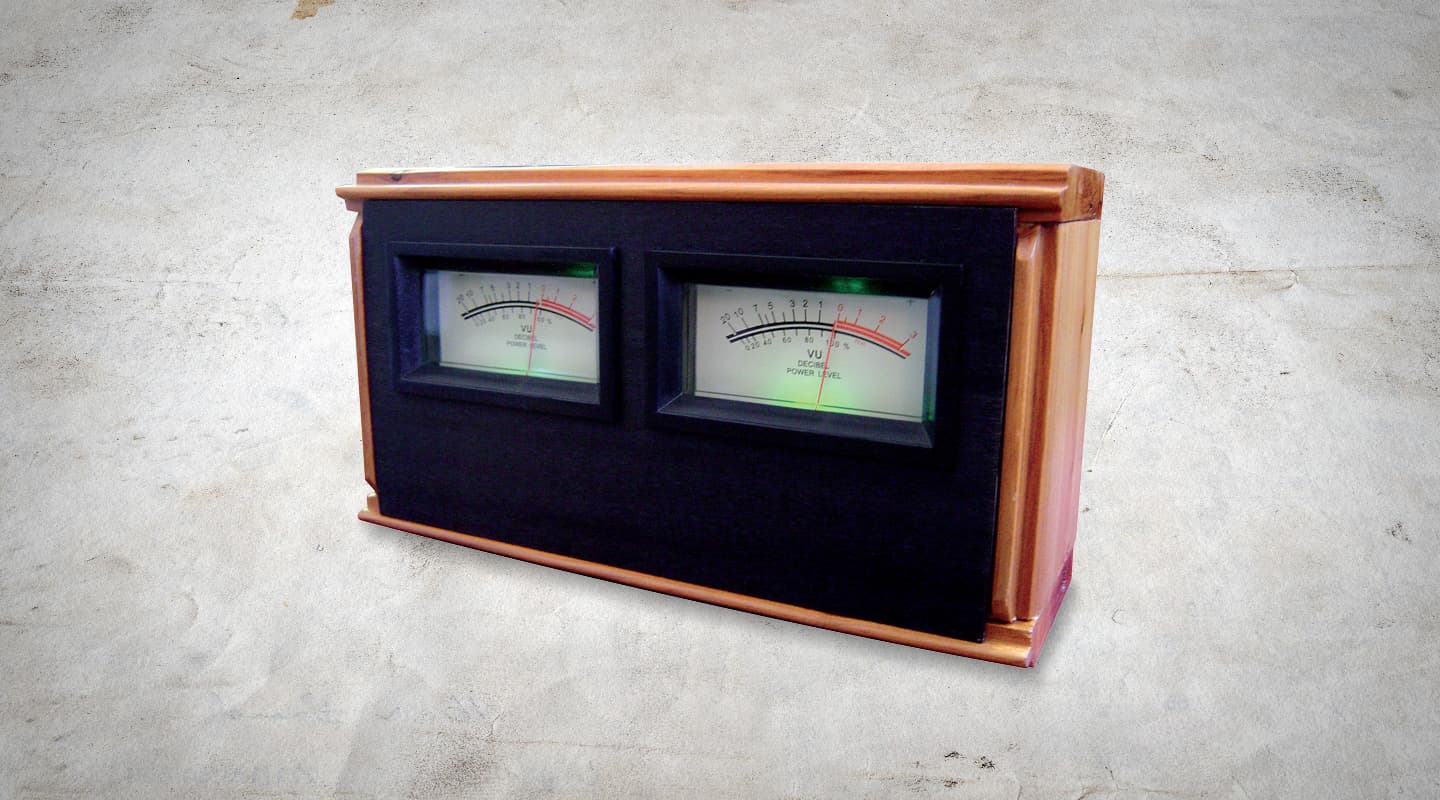
Although there are several software VU meter options on offer nowadays, capable of running in various DAWs, what’s vastly more desirable, I’d contest, is an authentic, mechanical VU meter: one with a needle, coil of wire and a magnet – preferably a pair of them – in a nice timber case or perhaps a hammertone metal case (for the hardcore meter watchers). We might also want illumination in the meters, the dim yellowy glow for that vintage feel, or the hard blue-LED look for the contemporary environment.
As Stav alluded to in his articles about ‘juicy’ VUs: they look damn cool and, let’s face it, when it comes to spending all day sitting in a studio, the look and vibe of your surrounds is vital to your sanity. A nice pair of vintage VUs dancing to the music is a thing of beauty.
So where do we get mechanical VU meters these days and how do we make them move? Well, there are a few prime sources of VU meters readily available. Some retail electronics shops stock them: Jaycar, for example, has limited supplies of a funky round VU meter (which is now discontinued, so be quick) and Altronics has a large meter with a mounting bezel. Other VU stockists include RS Components and Farnell. There are other sources as well, of course, such as online electronics and audio shops, garage sales, electronic ‘junkyards’ and eBay.

NOT ALL VU METERS ARE CREATED EQUAL
Now it’s one thing to find a couple of VU meters in a shop or pull them out of an old tape machine, but something else entirely to get them working accurately and reliably as part of your studio, live or broadcast setup. The aim of this article is to give you some info on what VUs to look for and how to get them working for you.
There are two fundamental types of mechanical or moving coil meter that may be presented as a VU meter. In a traditional sense only one type can be considered a real VU meter, and this is technically a low-level or low-range AC meter. In this type of meter, the incoming signal can be AC (Alternating Current), as is an audio signal, and within the meter this is converted to a voltage suitable for driving the coil – and thus the needle – in response to the amplitude of the original AC signal. This is achieved through rectification of the incoming AC, usually using a full wave bridge of germanium diodes. Rectification with a full wave bridge effectively ‘steers’ the alternating waveform into a direct current. (See Fig. 2 for an example of an original audio waveform and the same waveform rectified.)
Within the second type of meter this signal rectification circuit is not present, and thus, the meter will only respond to an audio signal if it has been converted to a suitable form before being presented to the meter – these meters are technically a DC (Direct Current) meter.
Thus there are two basic meter types: one that we can present audio to directly and another that requires some form of external circuitry to make it work with audio. Ideally, it’s better to purchase the first type (a low-level AC meter) and forget the complexity of extra parts required to make the direct current (DC) meter read audio.
But here’s the catch: all the cheaper new meters you’ll find for sale are really DC meters, which will require some external rectification circuitry. The cheapest new meter that you can run directly from audio is in the $100 ballpark. However, most ‘vintage’ VU meters are the correct AC meter type, so if you get lucky in the junkyard you can definitely save some dollars.
If you do have a true VU meter of the AC reading type it can simply be connected across your audio signal through the correct value resistor. (See Fig. 3 right.)


In this setup all that is required is the correct value resistor in series with the meter. This resistor sets the signal level which will give a 0VU reading on the meter’s scale. In a conventional setup most meters require a 3K6 resistor to yield a reading of 0VU for an incoming signal level of +4dBu. Given the correct AC-type meter this is therefore quite simple to implement. However, it also has a down side!
Do you recall that rectifying circuit inside the meter, which allows it to directly read AC signals? Well, unfortunately, this circuit severely distorts the signal and some of this distortion will make its way back to the signal path supplying the meter. The amount of distortion injected back into the signal path depends on the actual meter and also the impedance of the unit driving this path. Typically, anywhere from 0.03% to 0.3% distortion is injected into your signal path when a meter is simply ‘hung’ across it in this fashion. This result tends to rule out simply hanging some meters across your mix!
WHAT WE NEED!
What’s required is a simple circuit that can be used to buffer our meter from the audio. This provides isolation and prevents the distortion generated by the meter from getting back into the audio path. While we’re at it, we can also deal with the cheaper DC-type meters that won’t read audio without the rectification circuit and also a calibration control to set up the meter to read 0VU at our desired operating level.
This is the circuit I’ve come up with: (See Fig.1 above.)
Let’s call it the ‘Universal VU Driver’. It accepts a balanced or unbalanced audio input, will run off a single power supply rail (making it suitable for operating from a plug pack) and will also drive an AC- or DC-style VU meter. The gain of the driver can be also adjusted for a 0VU reading from –8dBu (which is equal to the semi-professional –10dBV standard) to +18dBu.
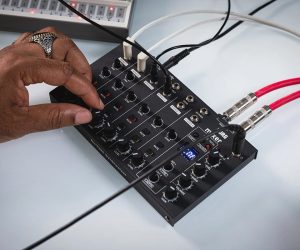
In the photo example (See Fig. 4 right), the XLR female and XLR male sockets of the two channels are simply wired pin for pin (i.e., pin 1 to pin 1, pin 2 to pin 2 etc.) thus enabling the signal to pass through the VU unit unaffected. Connection to the VU driver circuit is taken from pins 2 and 3, with the ground pin (pin 1) left disconnected.


IT’S ABOUT TIME
In addition to the distinction between AC- and DC-reading meters, which is made redundant by the universal driver circuit, there’s another significant difference between mechanical meters that separates true VU meters from the pack: the ‘ballistics’ or ‘time response’ of the meter. IEC standard (IEC 268 – 17: 1990 or the British standard 6840: Part 17:1991) specifies how quickly a VU meter should respond to audio and how much overshoot of the needle on a transient signal should occur. The standards specify a response time of 0.3 seconds for the meter to read 0VU from when the signal is applied and an overshoot of not more than 1.5%. The ‘overshoot’, if you like, is how far above the correct reading the needle rises before settling back down to the accurate reading.
It is this response time that’s responsible for the VU meter’s characteristic display of audio ‘volume’ rather than the peak level. An analysis of a VU meter’s characteristic would show that it is integrating the audio waveform, in a sense, adding up the area drawn out by the shape of the waveform. This yields the result of displaying the ‘volume’ of the waveform, thus its name: VU – Volume Units.
In this audio waveform, the meter will, in effect, read the size or ‘volume’ of the light blue filled areas of the waveform, and as we can see, the areas are dependent on time and amplitude. (See Fig. 5 right.)
By and large, the most expensive and vintage, true VU meters meet these requirements quite well, while some of the cheaper meters’ response times tend to be too quick. For example, the Altronics meter has a response time more in the order of 0.15 seconds and exhibits quite a bit of overshoot. The Jaycar meter has less overshoot but the response time is even quicker at 0.1 secs. These meters therefore tend to display a performance characteristic somewhere between a true VU meter and a peak meter. This can be largely dealt with by adding a capacitor across the meter – typically a 100µF cap will slow down the drive to the meter and yield a needle movement closer to that of a true VU meter.
The VU driver circuit I’ve come up with here is quite simple to construct, and anyone with some DIY skills will be able to build one on a piece of strip board quite easily. Power requirements are not critical and the unit will run happily from a 9V to 15V DC plug pack. The unit will accept balanced or unbalanced audio and presents a high impedance load, so it can be placed across an audio path without affecting signal levels and won’t introduce any hum issues when running from a plug pack. To assist with construction, JLM Audio (www.jlmaudio.com) in Brisbane is making an affordable kit available to readers interested in building their own VU meter driver circuit that will include a PCB and all parts; you just provide the meter and plug pack!
So get to it. Heat up that soldering iron and put the warm glow of VU meters back into your studio environment. You won’t regret it.


RESPONSES