
So You Want The Song In Eight Hours
Turning a blank audio canvas into a finished product for release in a matter of hours is no mean feat. Here’s how it’s done.
3 September 2011
Text: Blair Joscelyne
For most people in the audio industry, the concept of spending six months hanging out in a chandeliered mansion recording a few songs at your leisure is nothing more than a pipe dream. In the area of audio production where I work – creating music for advertising – there’s no comparison whatsoever. In the advertising world, deadlines are tighter than ever before, and the proliferation of gear that promises us even greater workflow efficiency means that clients now have incredibly high expectations for the delivery of music tracks.
Even the clients themselves have started using GarageBand in some circumstances, then saying things like: “This is easy; I can make a track in 10 minutes!” Needless to say, this has made delivery expectations for composers even shorter. Over the years the delivery time for providing a new song to an artist or TV director has slowly morphed from months, to weeks, through to days, and now hours. In fact, I was recently given just two minutes to come up with a theme track for a phone company!
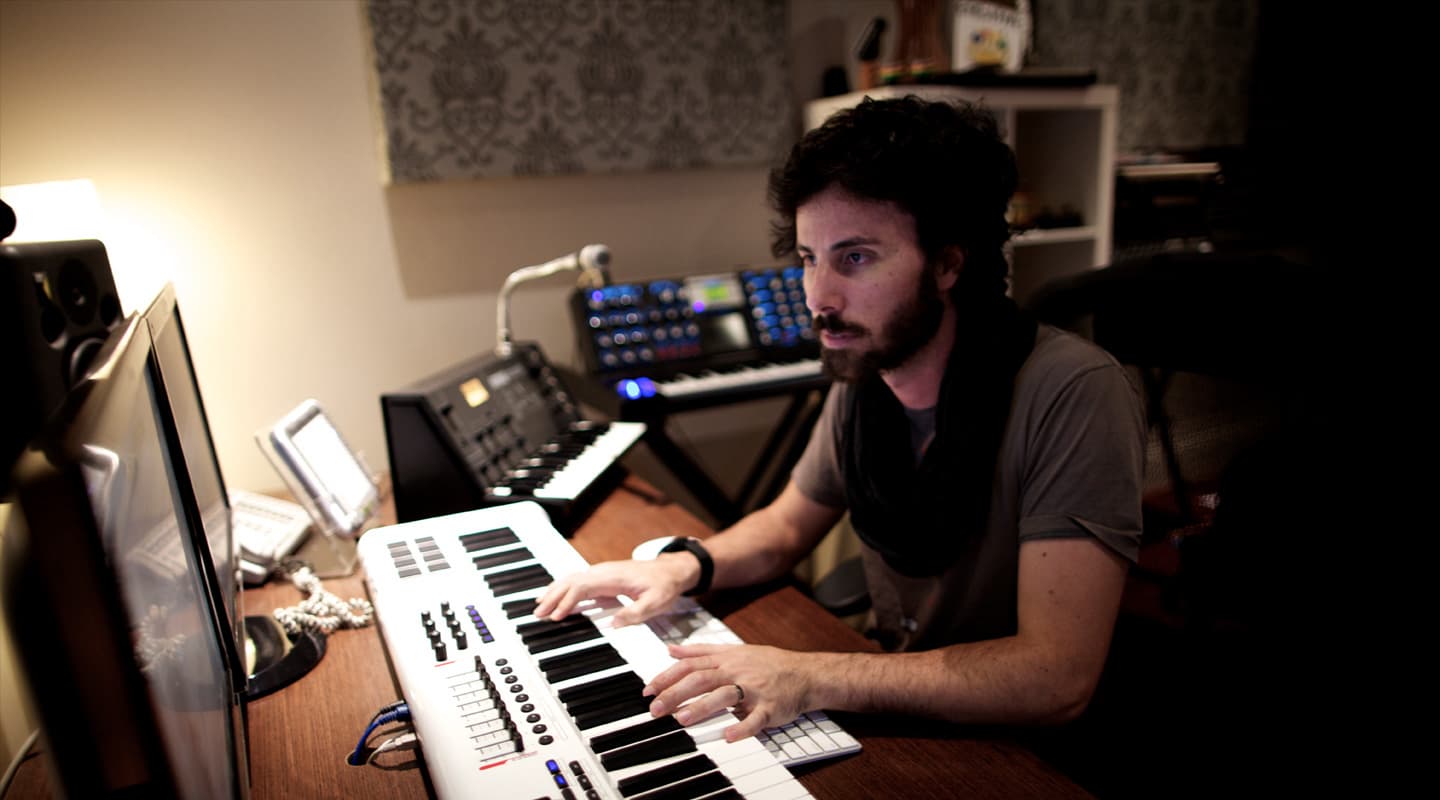
Luckily these days, as a full-time commercial composer at Nylon Studios, I’m given more than two minutes. On average I’m given about eight hours to compose, produce and master a new track, although on busy days I may have to do two or three. Composing and producing music this quickly is only made possible by my trusty sidekick, Karla Henwood, who looks after the clients and deals with budgets and timings. Karla spent years as the studio manager for Alberts Music so she knows everyone in the business. She books the session musicians and studio time at bigger tracking studios as and when I need it.
EIGHT IS ENOUGH
So how do you write, record and deliver a professional audio track in less than eight hours? The key is to be highly efficient and well organised. The techniques I use when writing music for commercials are all about speed and sonic interest, since commercials have the tightest turn around of any music tracks I am ever asked to write.
There are many types of music one can compose for an advertising campaign and I have to be across all styles of music, particularly the latest trends, and know what sounds and techniques are required to make them.
The first thing I do is spend five minutes – with no instruments – just working out what I’m going to do. This is the hardest part of the day and these five minutes dictate how the rest of the session will pan out. There’s no ‘magic’ here – just sitting quietly, planning the day’s events.

BANG! & THEY’RE OFF
As soon as I’ve worked out what I’m going to do, I let Karla know, and she books any musicians, vocalists or external studio time I may need.
From here on, there’s no time for second-guessing and I will power through for hours. If one of the musical parts of the piece is not working, I’ll mark it, keep going anyway and then remove it at the end. Musically I’ll spend only a few minutes working out each part before committing it to ProTools.
When I’m starting a new session I don’t use templates. In fact, I hate templates – even writing the word makes me feel cramped. I certainly don’t want to dictate what my session will look like before I’ve even started because for me, this cramps the creative space. I know templates can be useful, particularly in bigger tracking studios, but I avoid them like the plague.
When it comes to recording any instrument, I go for one of two options. The first is to pick one mic that I know will give me the sound I need, and then set up the preamp and just commit to the sound by recording it – effects and all – into ProTools. If I’m unsure or wanting to experiment, it’s best to get as many options down as possible in the shortest amount of time. I’ll use lots of mics, perform once or twice through and then move on.
PLECTRUM SPECTRUM
So let’s say my decision five minutes ago was to record a ‘rock song’ for a commercial. These are slightly more difficult to pull off within the time constraint and often require shooting across town to a different studio, though not always. So let’s get cracking… time’s a wastin’.
When it comes to guitars there are loads of ways to get a huge variety of sounds from just one instrument, using different production and performance techniques. The first thing to do – though you can’t do this once the clock has started ticking – is to go out and buy every kind of plectrum your local music shop has. I have a box sitting on my desk and I’ll use a different style of pick for each recorded take I perform. The strings respond differently to different materials and depending on the flexibility of the plectrum, the playing style is also affected, giving the listener a slightly different ‘performer’ to listen to. Change the strings regularly, or boil them if you’re on a budget. It’s easier to have clear sounding strings than to try and add sound that wasn’t there in the first place. Saying that, I always keep one old guitar with 20-year-old strings on it because the sound of a cheap home bedroom guitar is popular at the moment.
To cover the spectrum of sounds I have a variety of guitars hanging on the wall including a Strat, Les Paul, a steel string acoustic, nylon string acoustic, bass guitar, and a few ukuleles, mandolins and banjos, which never go astray. I also ‘prepare’ the guitars sometimes by sticking twine, paper and cloth on the strings for different unusual sounds.
When it comes to electric guitars I go straight to amp simulators every time now. These are solid, albeit predicable, ways of getting good guitar sounds instantly. If you’re working on an album or a film over a longer period of time, then sure, amps are great, but in a hurry nothing beats a V-Amp or virtual Guitar Rig, even though it doesn’t feel as ‘real’ as a guitar sometimes should. Even Damian De Boos, one of Sydney’s most prolific session guitarists confessed to me recently that he doesn’t use an amp now during sessions unless it’s an album recording or film soundtrack. It’s Guitar Rig for everything else.
I also have an old ’60s tape delay that’s permanently patched into my setup for some extra grit – this is instantly patchable through the V-Amp. I’ll often set up a sound that I like and just track with it on.
RECREATING THE BAND
It’s important to make sure that each time a new guitar part is laid down, that you use a different guitar, or at least different settings, to realistically re-create a ‘real’ band. This can be as simple as flicking to a different pickup or adjusting the tone of the guitar. Ideally, I would change guitars, use different settings, and sometimes detune the whole guitar, then capo it back up again for a slightly different sound. Forget using the presets in stereo with loads of built-in reverb and effects unless it’s literally the perfect sound. These ‘stereo presets’ are usually just mono signals sent through different internal effects and spat out the left and right side of the plug-in. They rarely sit well in the mix once you start overdubbing loads of them, and typically end up sounding like moss. If you’re going to be overdubbing heaps of tracks, record them in mono and then pan. Add FX from your DAW and you’ll have a much fuller, cleaner and well-defined sound.
When I’m recording a one-man ‘rock band’ (ie. me), I try to create different personalities in the sound, to mimic the different personalities of a real band. In this situation, each guitarist would have their own gear, setups and style so I try to mimic this when recording, even moving or shaping my body in different ways to create the different ‘band members’. One take may be recorded standing up with a strat, and the next take done sitting with a Les Paul with head hanging down. Pretending to be different characters makes new and unexpected characters jump out of your recordings. Sounds odd, but it works.
KEEPING THE ROCK ROLLING
If you’re unsure of what sound you want, don’t spend an hour getting the sound you imagine in your head but just can’t find. In a hurry just use as many mics as you can if you’re unsure, and decide later. I’m using guitars here as an example but this applies to any instrument. I may have a Rode NTK 20cm from an acoustic guitar’s sound hole running into an Avalon 737, with an AKG pencil mic or C414 pointing down the neck and then I’ll swivel in my chair until the balance between the two sounds good in my headphones. In addition to this I always have an SM58 sitting on my desk, and an old ’60s Dictaphone microphone that are always patched into ProTools. I hit record on those ones too. I don’t rely on them, but they’re always recorded. In fact, I don’t even move them or try and get them into a sweet spot. Those ones are for the bonus accidental magic and sometimes they capture something special and lo-fi (which everyone wants in advertising at the moment). Lastly, I’ll often use the ‘Memo’ function of my iPhone4 and just hit record on that too, and leave it sitting somewhere in the room. You can also call your own phone while recording and leave the recording as a voicemail message. It sounds distorted, compressed and noisy – perfect!
With all these options recorded from just one take you can start building the body of the song. Sometime I will completely ditch the clean recordings and use the crusty Dictaphone track, with some iPhone mixed in. Recording with all these different microphones gives you the option of beginning the track with a centre-panned crusty track, then when you hit the chorus, bringing in the Rode and AKG tracks panned hard left and right, followed by the iPhone audio for the bridge. With just one pass you’ve now got the formation of a song, including layered guitars for the chorus. If you’re happy with that take, now grab a different guitar, a different pick and swivel around on your seat for a different relationship between the guitar and microphones. Sometimes I’ll also attach a homemade piezo to the body of the instrument for an extra flavour. The trick is to get the widest variety of recorded material and the biggest sound in the smallest time frame. If this means one microphone then just commit and go for it. If you’re not sure, use multiples.
When it comes to electric bass guitar I only offer myself two options when I’m on a deadline. Either DI it straight into the Avalon, which gives amazingly round results every time, or for some more crunch throw it through my V-Amp, which has digital outputs going into ProTools. There’s no time to try 50 settings. Know your gear well enough to know what kind of bass sound you need and what needs to be dialled up to make it happen. If the track requires synth bass then I’ll use my Korg MS20, or my MiniMoog, which is MIDI, patched right into ProTools. Play it in. Bass done!

DRUMMING UP BUSINESS
I make recording drums super simple. Our drum room here at Nylon has the kit mic’d up and ready to go at all times. While for some circumstances a full mic’d up kit is suitable, I actually have more fun playing with three of four mics. I experimented as a teenager with one and two mic setups and I’ve gone back to that now: AKG D30 on the kick and an overheard. If I need them to cut through more then I’ll throw a 57 onto the snare, or strap my Dictaphone mic to it. Realistic results can be achieved in a hurry by programming in the kick and snare with samples, and then just overdubbing real hi-hats and cymbals. Sounds real, is super fast and means you can do the whole ‘kit’ with only one mic in a matter of minutes. There’s no weird phasing and the isolation is fantastic. When time is seriously limited and recording is not an option, I’ll pick some sounds, throw them into Battery and then play in all the drums with a MIDI keyboard. I have a box of percussion so tambourines and shakers can be layered as needed using the same techniques.
THE FAKE GOANNA
Pianos are a hard thing to fake, and while some plug-ins do an okay job there’s no substitute for the real thing. I’ve got a grand piano at home but rarely have the time to use it for recordings, so once I know a track needs or requires piano I’ll get Karla to book a studio. Most of the time we will know earlier in the week what we’re doing each day, which makes booking a piano room and mastering much easier. I also have a student piano, which sounds cheap and rough. And here’s the kicker: if you have an instrument that sounds ‘bad’, don’t spend your time trying to make it sound good. If it’s inherently bad, it will never sound good, so if I have to record a rough instrument I’ll accentuate its flaws (see the ‘Microphone Choice’ box item for more on this). Piano creaks, clunky pedals; I’ll record them all with a vintage microphone and be done with it.
When recording grand piano, I’ll use a plug-in to lay down all the scratch tracks and if we’re organised properly then the piano studio will be booked and I’ll grab a hard drive and rush off halfway through the day. The piano needs to be mic’d and primed and ready to go as soon I get there. We’ll use up to eight microphones so that I have a choice later but realistically the piano will come down to two close mics and two room mics. In one hour I can get two full piano tracks done for two different songs. I get the studio to record everything onto my own drive and then its back in the car and back to Nylon.
By the time I get back to the studio all the drums, bass, guitars and keyboards are recorded. It’s only at this point that I have time to sit back, listen to the track, get some levels happening and start writing the lyrics. Once I let Karla know that I’m writing lyrics I know I have around 30 minutes until a singer will arrive.
Once the lyrics are written and I’ve come up with a melody, I use the SM58 sitting on my desk to record a guide vocal. This cements what it should sound like in my mind, and has the added benefit of showing me a waveform of the whole vocal performance. This becomes my map for ‘chasing the flame’ and riding the gain knob live during the takes on the Avalon. Main vocals usually run through a Rode NTK into the Avalon and I track with EQ and compression. I’ll use Waves plug-ins on the vocals and these days I mix the vocals pretty dry. As with acoustic instruments, harmonies are recorded with a variety of different microphones. I’ll also record in the kitchen, stairwell or other areas of the studio facility to give each harmony its own space. I have an old circuit-bent phone that runs off a 9V battery and that gives an amazing faux vinyl sound. The most important part here is to get a variety of different performance styles in case the client wants to try something different. Stav’s book, Mixing With Your Mind changed the way I record vocals and if you haven’t read it then you simply must. In fact, just go and buy it now and I’ll stop writing about vocal recording!
MIXING IT UP
With the vocal in, I will lay in any synth parts, or kooky homemade instruments and pull a mix as fast as I can, depending on how much time is left in the day. Like most producers these days working with DAWs, the mixing happens throughout the day so there isn’t really a window of time I particularly dedicate to mixing.
For most spots I will do my own mastering using a Waves L3, but for any commercially released tracks, or big TV spots that I know will be running for years I’ll get the music mastered elsewhere. Quite simply, the other guys in town can do a better job than me. AT writer and long time mastering engineer, Rick O’Neil, from Turtlerock has mastered some of my bigger TV spots like the music for Jetstar, Arnotts and Origin Energy. I turn up to the studio and Rick immediately asks me what the final destination is. I say “Well Rick, this will play on TV every day for the next two years, as well as phone on-hold systems, cinema ads and websites. The client has also asked us to release it as a single, so make it sound good for all those things please.” At this point Rick turns around in his chair and I have no idea what he’s doing but it always sounds better when I leave. Having an expert like Rick go over your track and do a proper master is probably the best investment you can make in the post–production stage of your song. I grab the files and head back to Nylon.
By now the calls are starting to filter in saying, ‘What time will the track be ready?’ and while that’s happening, the final file is uploaded and a link is sent to the client. At this point the client will download the track and probably listen to it off the speaker in their iPhone. If I’m lucky it will be played on a proper system in an edit suite or another studio. All going well the song is signed off, and sent off for broadcast. Then tomorrow we’ll do it all again…
Blair Joscelyne is a full-time composer at Nylon Studios, Sydney and also provides music to Nylon New York. His music has been used by companies such as Smirnoff, VISA, AT&T, Ford, IBM, Touchstone, Lexus, Discovery Channel and Toyota. More info at
www.nylonstudios.com and www.facebook.com/blairjoscelyne


RESPONSES